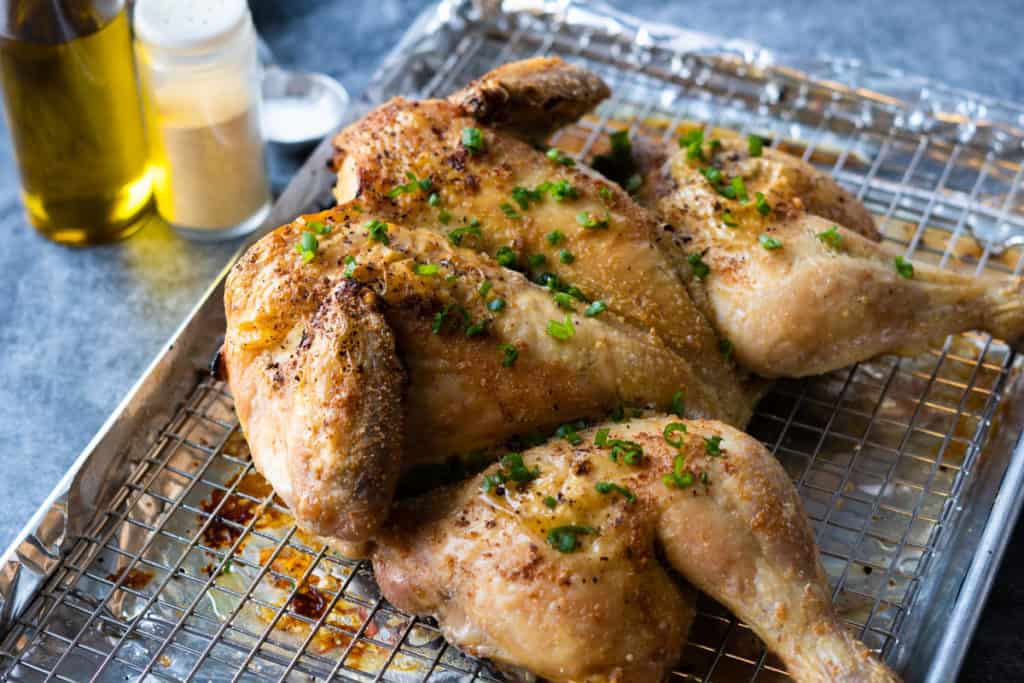
The best way to enjoy the natural flavors of a good quality chicken. This 4 ingredient roast chicken is so easy with just a few of my simple techniques. Crispy, savory skin with tender flavorful meat, this will become a busy weeknight staple but equally a hit at any dinner party!
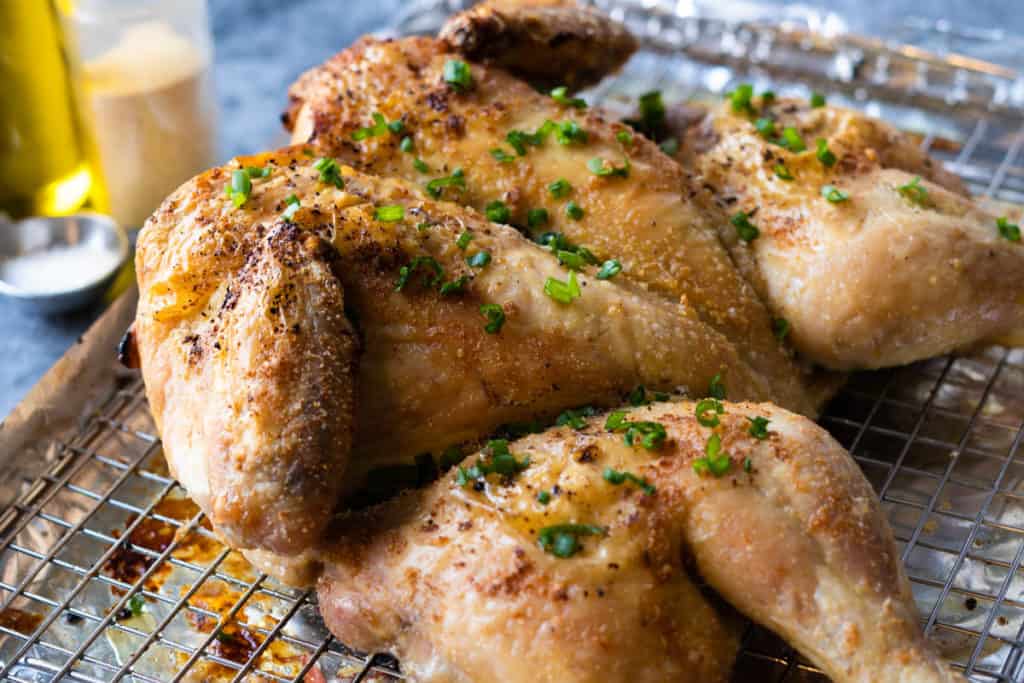
This is probably the most foolproof and laziest way to make an entire chicken with minimal active cooking time. I make this 4 ingredient roast chicken almost weekly because it doesn’t require much prep at all and my family thinks I’m a master roaster. I’m really not, I just know a few simple tricks which I’ll share with you in this post 🙂
Toss potatoes and carrots with salt and olive oil, roast on a second tray and dinner is ready in 45 minutes. The chicken that comes out has the crispiest tastiest skin and every bite is full of umami chicken-y flavor. What’s not to love?!
- 4 ingredient roast chicken
- Why roast chicken without butter?
- Expert tips to the best 4 ingredient roast chicken
- How to buy a good quality chicken
- How to spatchcock a chicken
- How to make 4 ingredient roast chicken – step by step instructions
- Alternatives/Substitutions
- Serving Tips
- Storing Tips
- Frequently Asked Questions (FAQ)
4 ingredient roast chicken
There are 200+ ways to cook and season a chicken, but how about just using 4 ingredients? This is probably the way I roast my chicken 99% of the time using only:
Chicken – A good quality chicken means you pretty much have all the flavor you need. Not all chickens at the supermarket are created or packaged equally so make sure you get a quality air-chilled one on a tray.
Salt – Salt is a megaphone for flavour. Even with the best spices, without salt, your dish will fall flat. Aside from the chicken, salt is the next most important ingredient. It’s also important to make sure you season properly, ½ tsp – 1 tsp for every lb depending on the type of salt.
Oil – Oil will get you a more even brown color on your chicken by distributing the heat from the oven more evenly. It prevents the skin from turning leathery and drying out. Still crispy enough!
Garlic powder – Garlic and chicken just go together so well. This is my personal favorite but any dry rub will do.
Ok I know it’s four ingredients but a bit of soy sauce doesn’t hurt because I try to put soy sauce on almost everything I cook (I blame my mom and Chinese heritage).
Why roast chicken without butter?
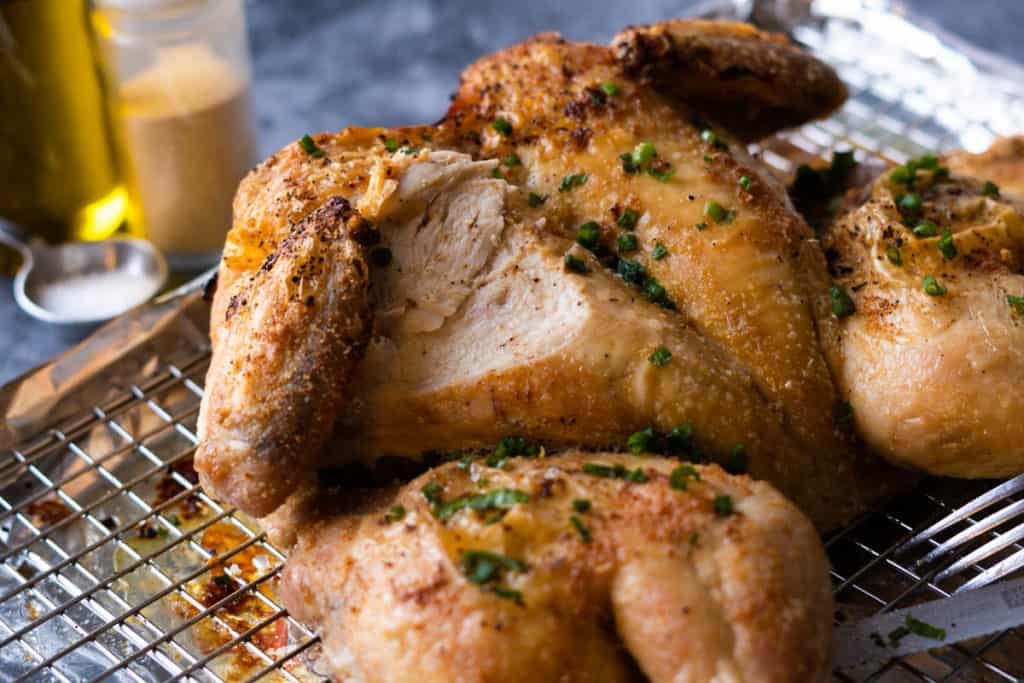
There is no doubt butter creates a beautiful brown color to your chicken like nothing else. To be honest, I only ever use butter on my turkey. Never for my chicken because I just find it too much of a hassle without as much flavor gain.
Roasting a chicken with butter will add unwanted moisture to the surface of your skin creating a soggy texture. I think chicken skin should be crispy and the next best thing is oil. Chicken skin with nothing on it will produce the crispiest skin. Added oil will make it slightly less crispy but cook more evenly. A win-win.
Expert tips to the best 4 ingredient roast chicken
- A quality chicken – This recipe doesn’t call for many ingredients so it’s important to get a good quality chicken since much of the flavour will come from it. I explain what to look for in the following section.
- Dry-brine – Dry brining means salting your chicken in advance of roasting and letting it rest (at least 40 minutes) to let the salt do its work. Salt draws moisture out of the meat, dissolves and gets reabsorbed back in allowing the meat to be seasoned from within. Dry-brining will always produce more juicy and flavorful meat with a firm texture similar to cured meat. It also creates some buffer for overcooking. For chicken, it’s ideal to salt the day before up to a minimum of 40 minutes before roasting.
- Spatchcock – Spatchcocking otherwise known as butterflying allows all parts of the chicken to cook more evenly. Roasting a whole chicken (with breasts the highest point of the chicken) often overcooks breast meat or undercooks thigh meat. Cooking your chicken flat allows the thighs to cook faster than the breast which is what we want. If having your chicken trussed isn’t important (i.e. your in-laws aren’t coming for thanksgiving) spatchcocking will produce the crispiest and moistest bird.
- Oil – Coating your chicken in oil will allow the heat from the oven to distribute more evenly during cooking and better browning.
- Bake between 425°F/218°C to 450°F/232°C – You need high heat to roast chicken and create a crispy skin. Depending on your oven it should be between 425°F/218°C to 450°F/232°C.
- Use a meat thermometer – This is the foolproof way to ensure your chicken is cooked properly. Insert the thermometer on the thickest part of the breast and thigh close to but not touch the bone. Breast meat is cooked at 145°F and thigh is cooked at 160°F. Honestly, I’ve let my breast meat get to 160°F often and it’s still moist thanks to dry brining!
- Use a baking tray (ideally with a rack) – A rimmed baking tray is the best pan for roasting chicken. It allows the hot oven air to circulate and cook more evenly and since the chicken is more exposed, the skin ends up more crispy. Plus, easier to clean than a roasting pan! A wire rack will ensure the bottom also gets crispier but baking directly on a lined baking sheet is fine too.
- Rest it – Like all protein, resting allows the juices to redistribute evenly throughout. Let roasted chicken rest for 10-15 minutes before cutting it to ensure moist results.
How to buy a good quality chicken
Unfortunately, not all chickens are created or packaged equally. I’d recommend finding a local, fresh (not frozen), air-chilled chicken. Organic if you can because it means the chickens were raised more humanely, fed more nutritionally and in a better environment.
Choose chickens that are not wrapped in a Cryovac bag because chances are they were previously frozen. Make sure the packaging also doesn’t have a lot of juices in it as well. Lastly, air-chilled means the chickens are cooled in blast coolers and not in ice water. Chicken submerged in ice water retain more moisture and won’t brown and crisp as well. The key is to make sure there isn’t excessive water or moisture surrounding your chicken.
How to spatchcock a chicken
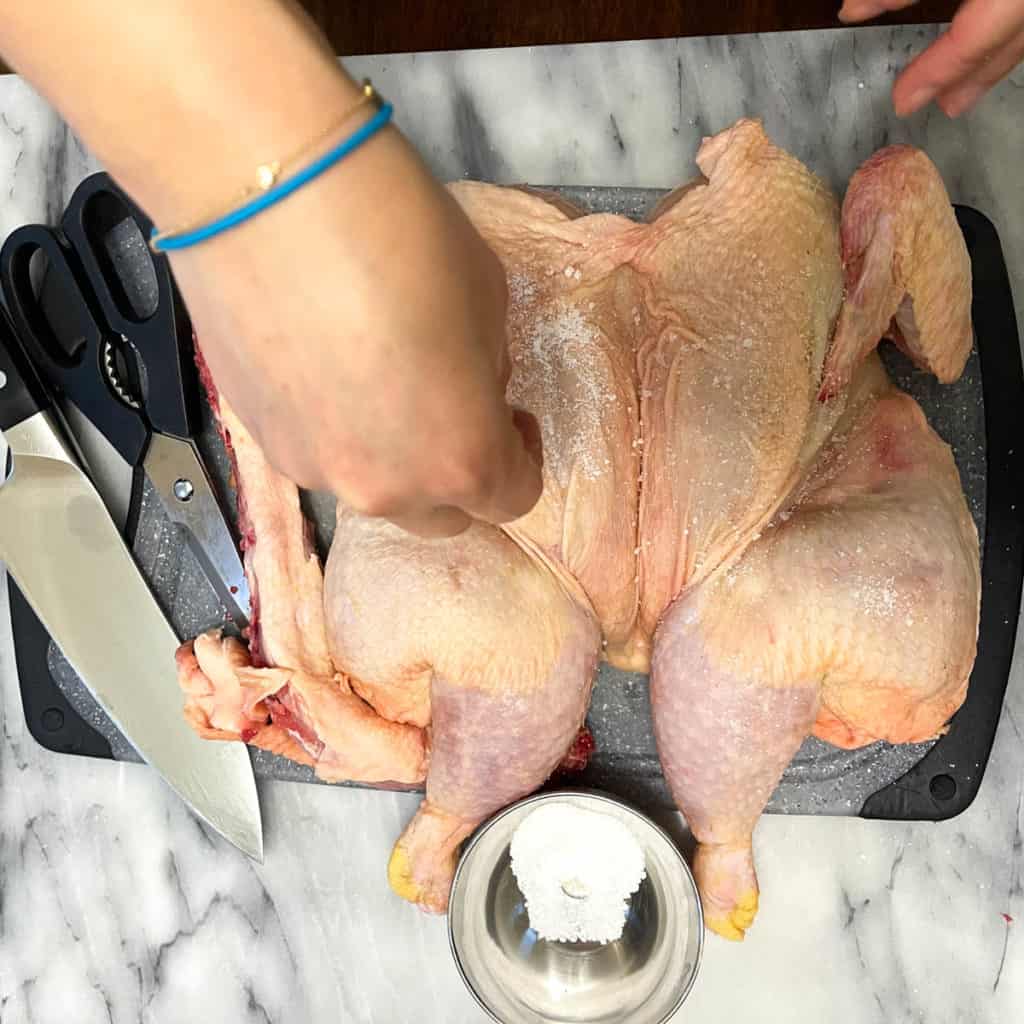
Spatchcocking is very easy and I do this every time I roast a chicken. You will need a cutting board, sharp knife and a pair of kitchen shears.
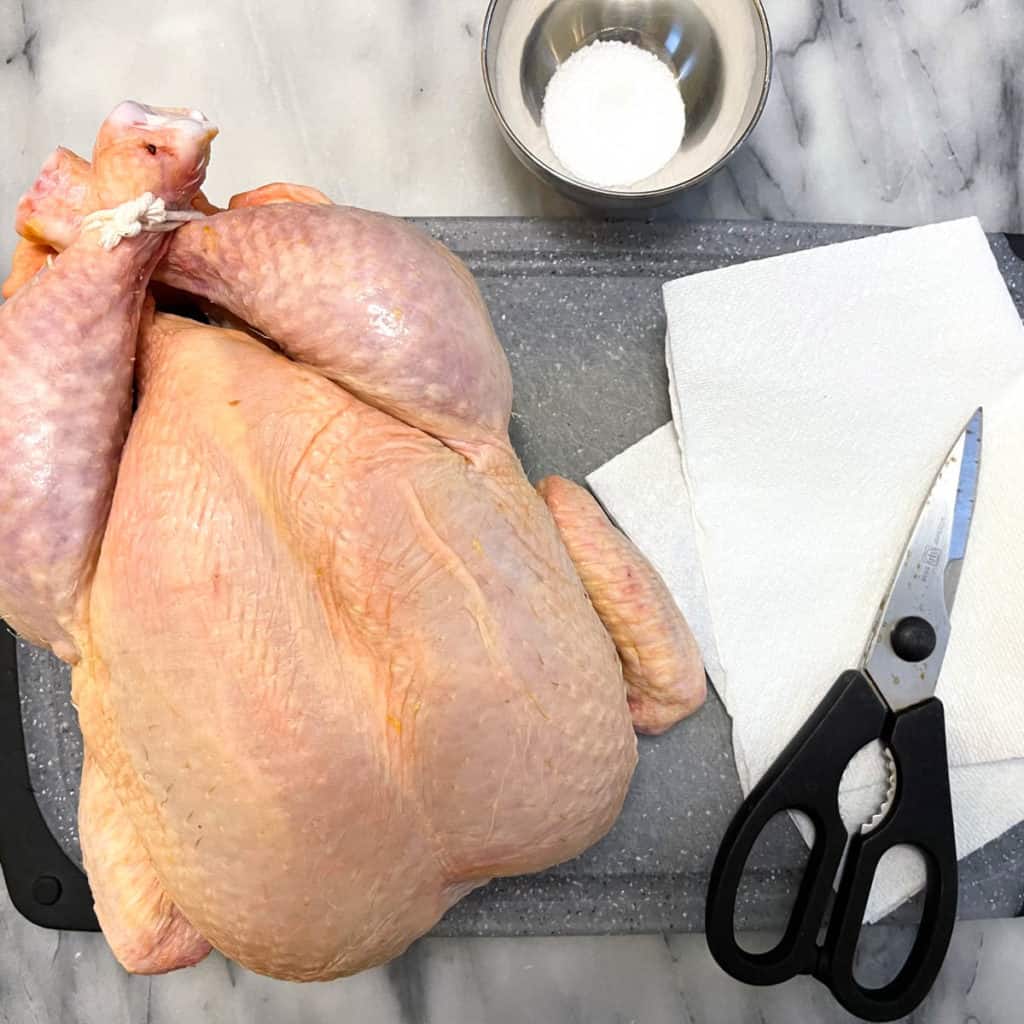
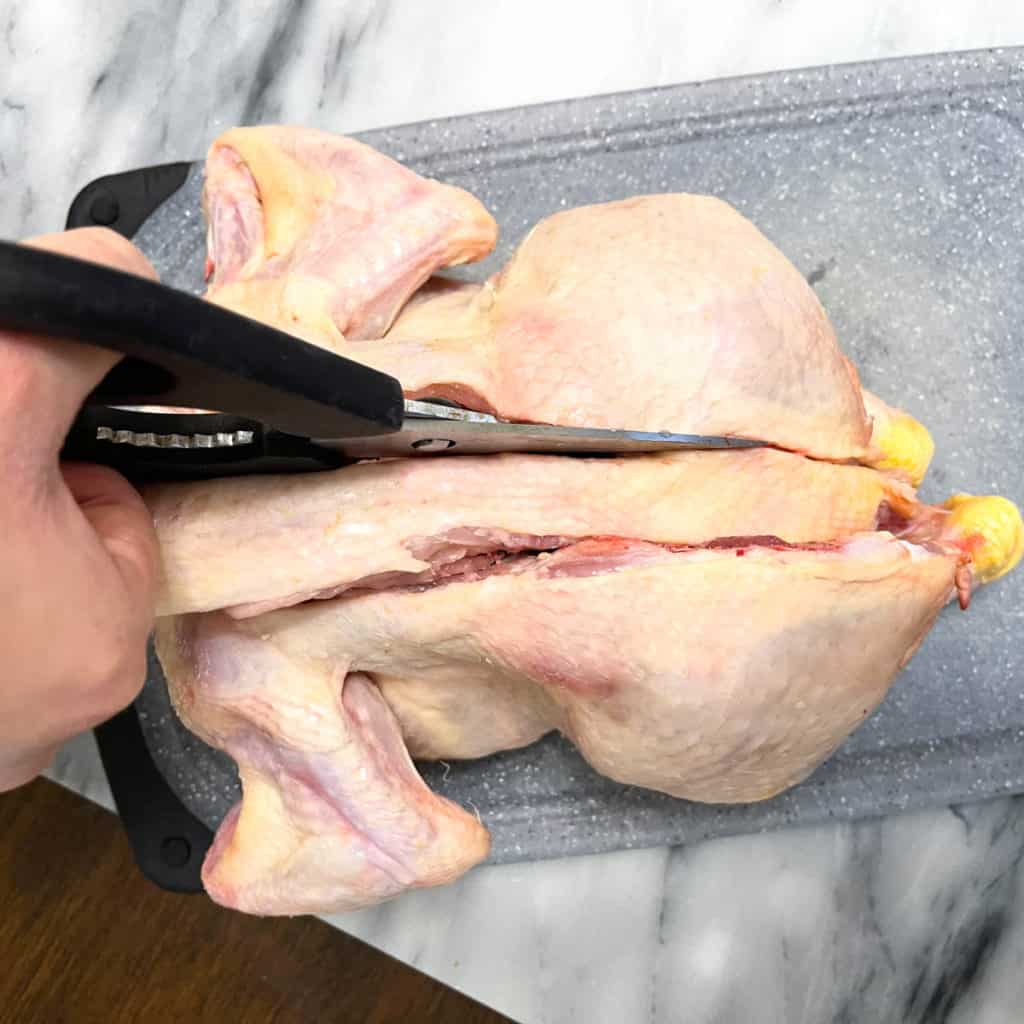
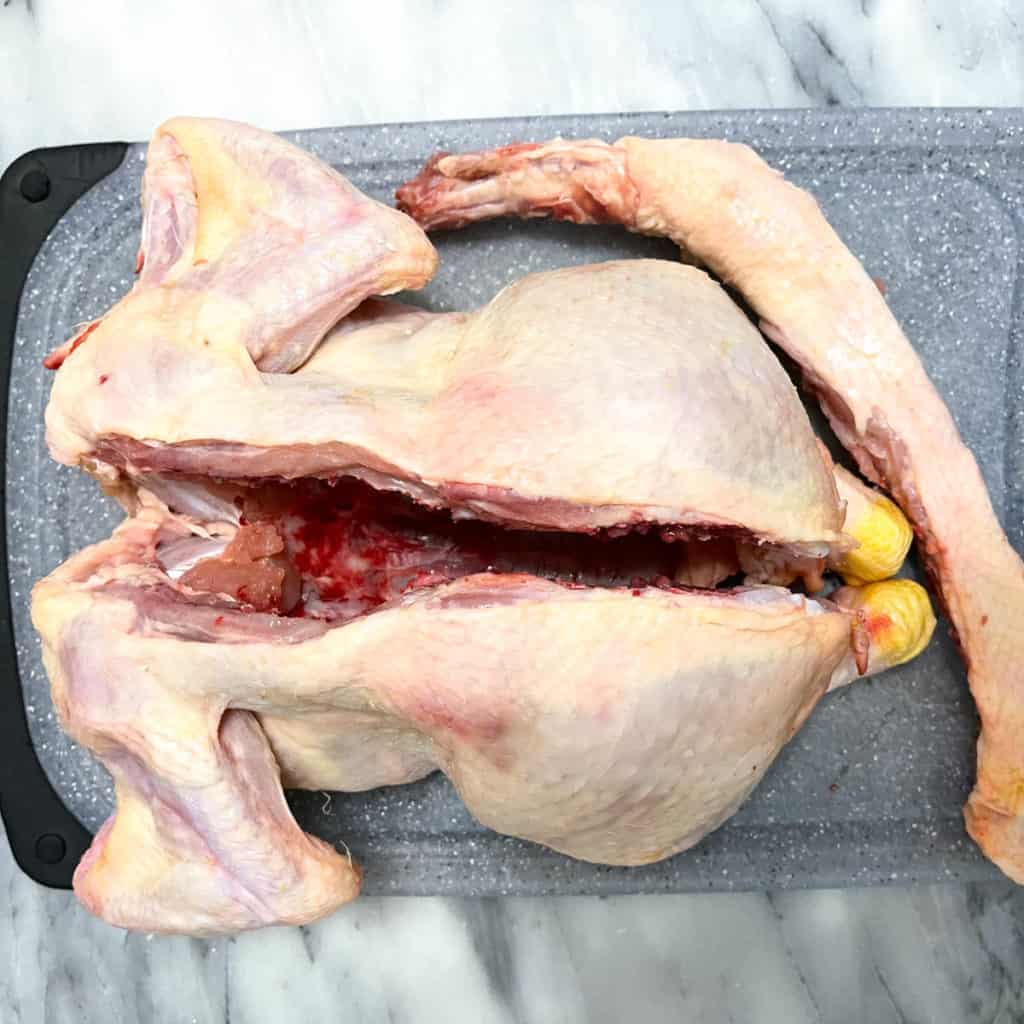
- Place your chicken on your cutting board. Put a damp paper towel underneath your cutting board if you find it moving.
- Using your kitchen shears, cut along the spine of the chicken and remove it.
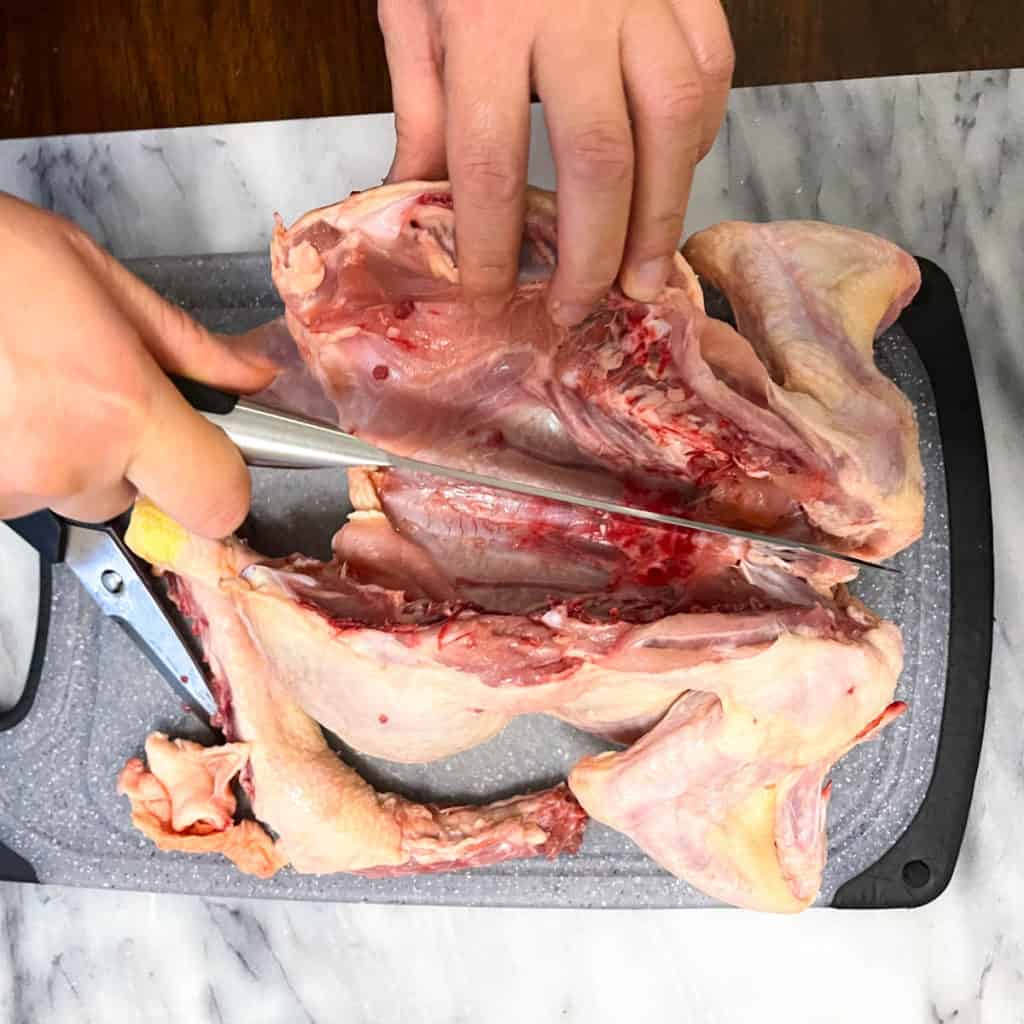
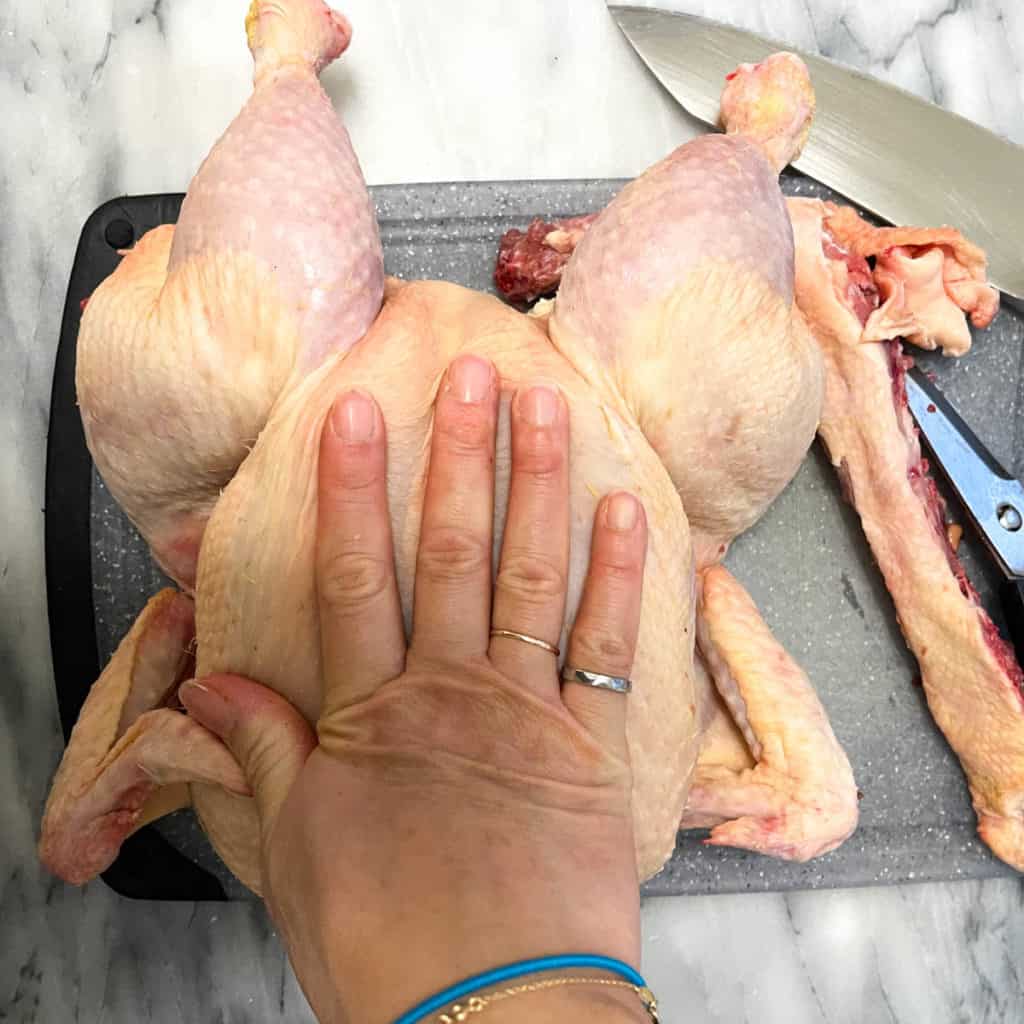
- Taking your sharp knife, make a shallow incision inside the chicken cavity in the middle of the breast bone.
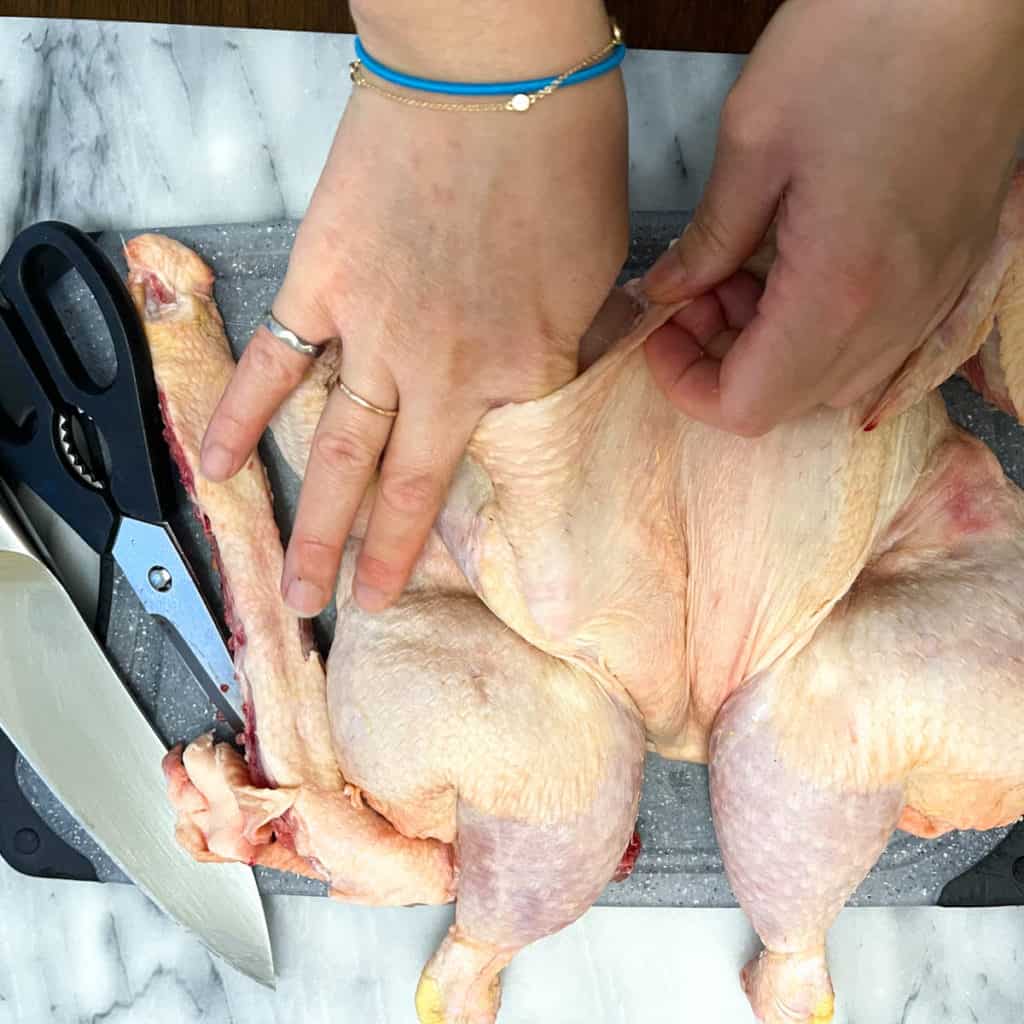
- Flip your chicken breast side up. Place your hand between the two breasts and press firmly down, flattening the chicken.
- Move the chicken legs inwards. Clip off the chicken wing tips with the kitchen shears if desired.
How to make 4 ingredient roast chicken – step by step instructions
Dry brine the chicken
- Using paper towels, blot as much moisture from the chicken and remove any leftover blood clots (particularly around the spine).
- Separate the skin from the meat by placing one or two fingers from the neck and working your way down the breast to the bottom. Go from the bottom and work your way up. Work gently and carefully to not tear the skin.
- Sprinkle the salt all over the top of the chicken and underneath the skin
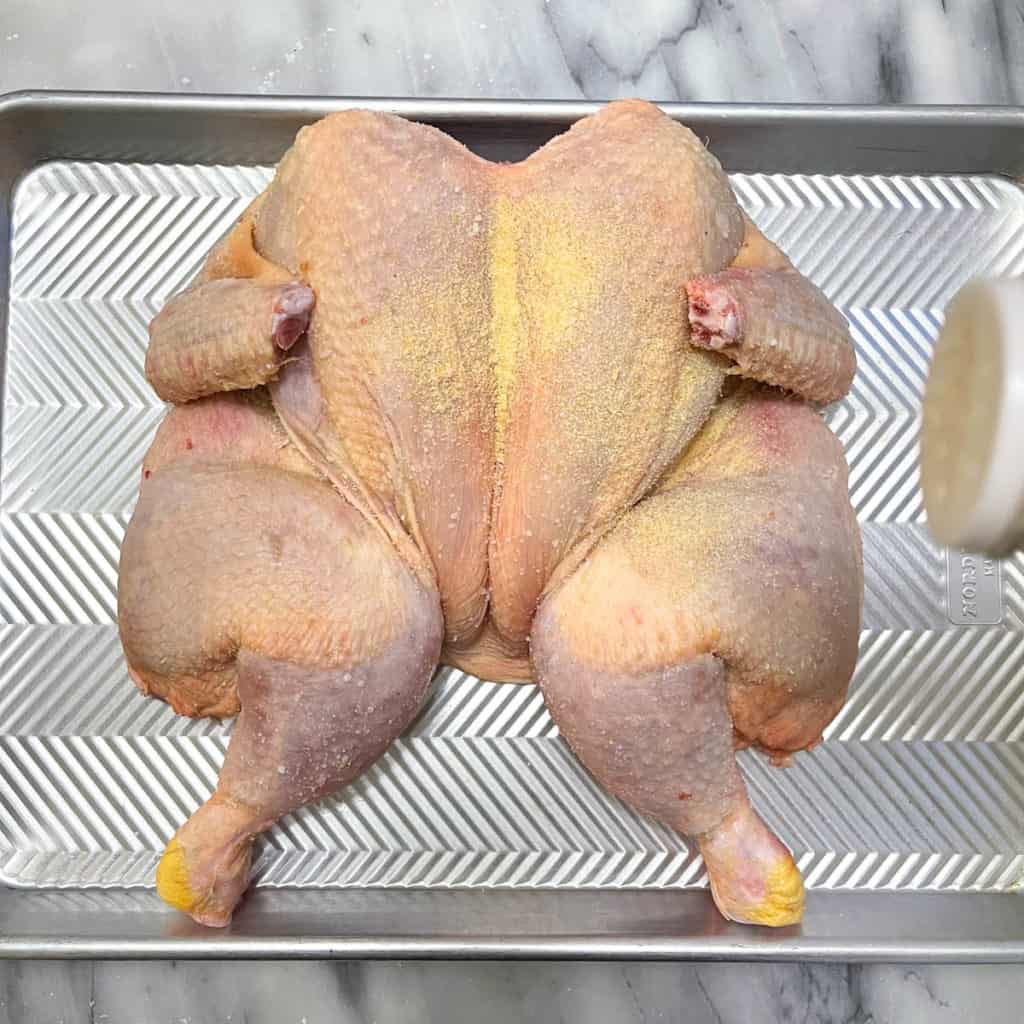
- Sprinkle garlic powder evenly all over the chicken.
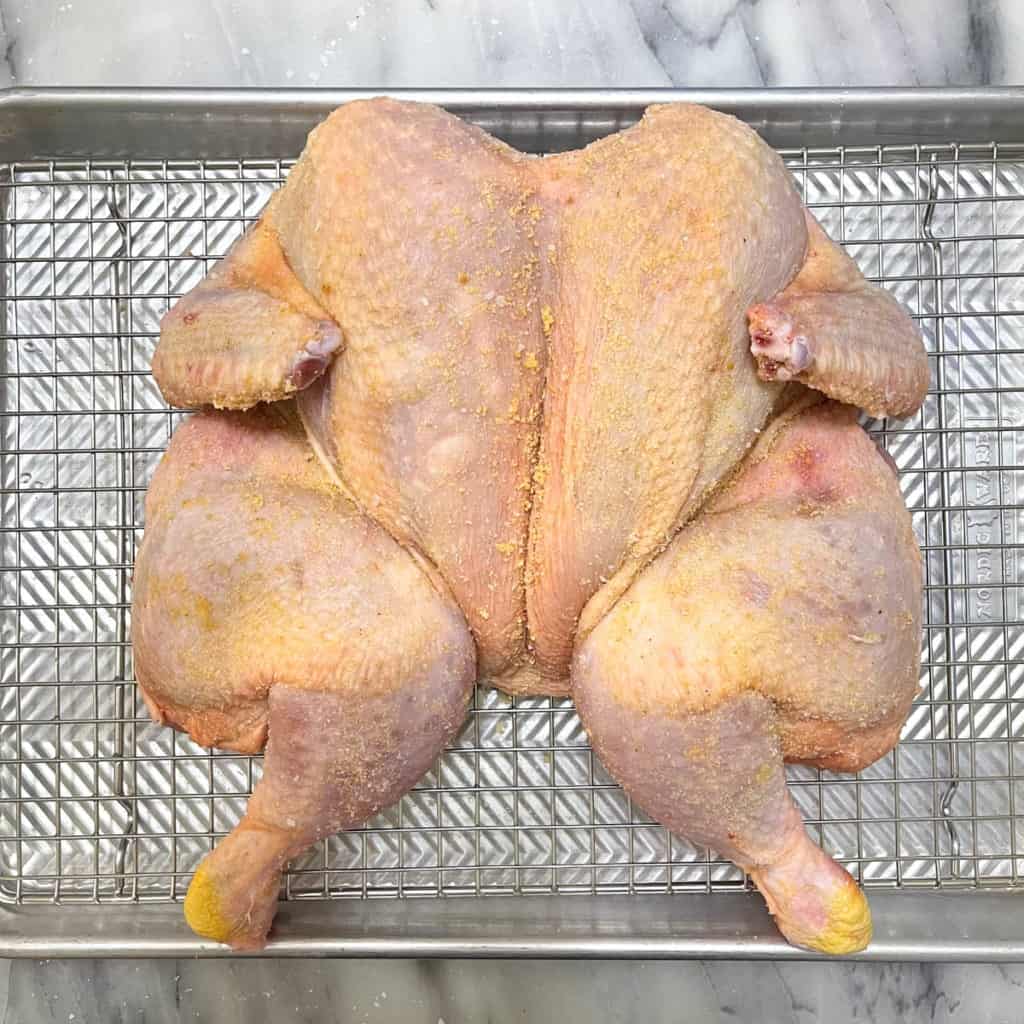
- Line a rimmed baking sheet with aluminum foil and place a wire rack on top. Lay the chicken flat on the rack with the breasts in the middle of the pan and the legs outside.
- Place the chicken in your fridge uncovered overnight to dry.
Roast the chicken
- Take out the raw chicken about 30 minutes before roasting and let it sit at room temp for more even cooking. Preheat oven to 425°F/218°C.
- Rub the chicken all over and under the skin with oil.
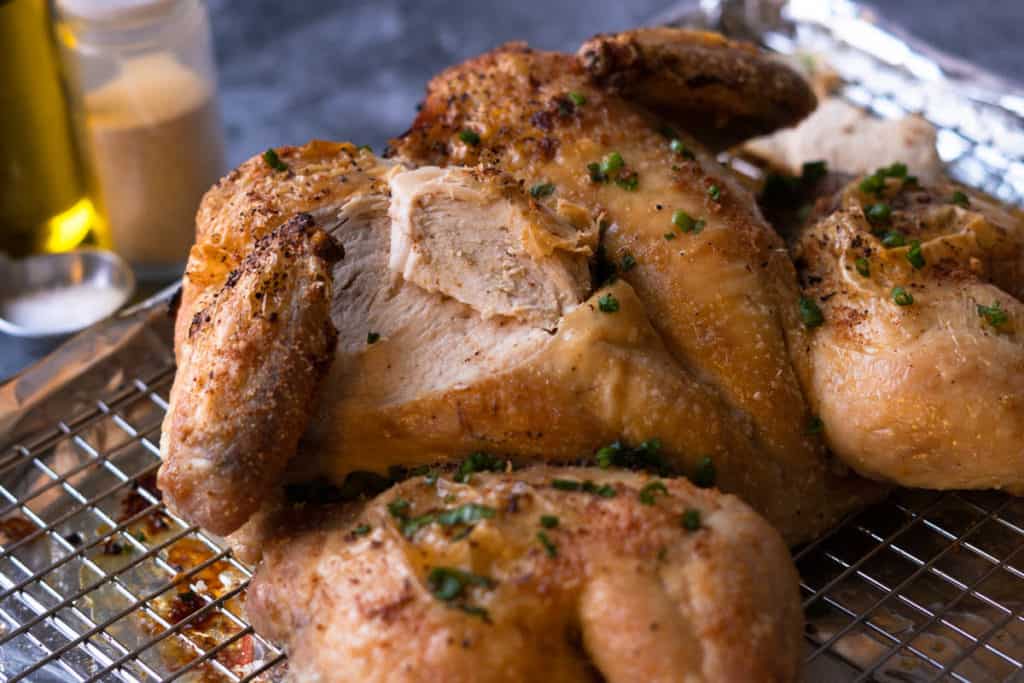
- Put the entire tray into the oven for 35-40 mins depending on its weight
- Using a meat thermometer. Check the thickest part of the breast close to the bone and make sure it reads 145°F (63°C). In the thickest part of the thigh close to the bone, check to make sure it reads at least 160°F (72°C).
- Let it rest uncovered in the tray for 10-15 mins before carving (temperature will continue to rise).
Alternatives/Substitutions
Oil
Any oil with a high smoke point will work well for this recipe such as vegetable, canola, grapeseed and avocado oil. I also find olive oil works well too (even though it’s lower smoke point).
Dry rub seasonings
Replace garlic powder with just cracked pepper and you have your classic simple roast chicken. Any dry herbs will work beautifully with this recipe. Italian, greek or cajun seasoning, paprika, cumin and/or 5 spice powder etc. I personally like using soy sauce and dried thyme in addition to the garlic powder for an east meets west fusion that my kids embrace (with open hands).
Serving Tips
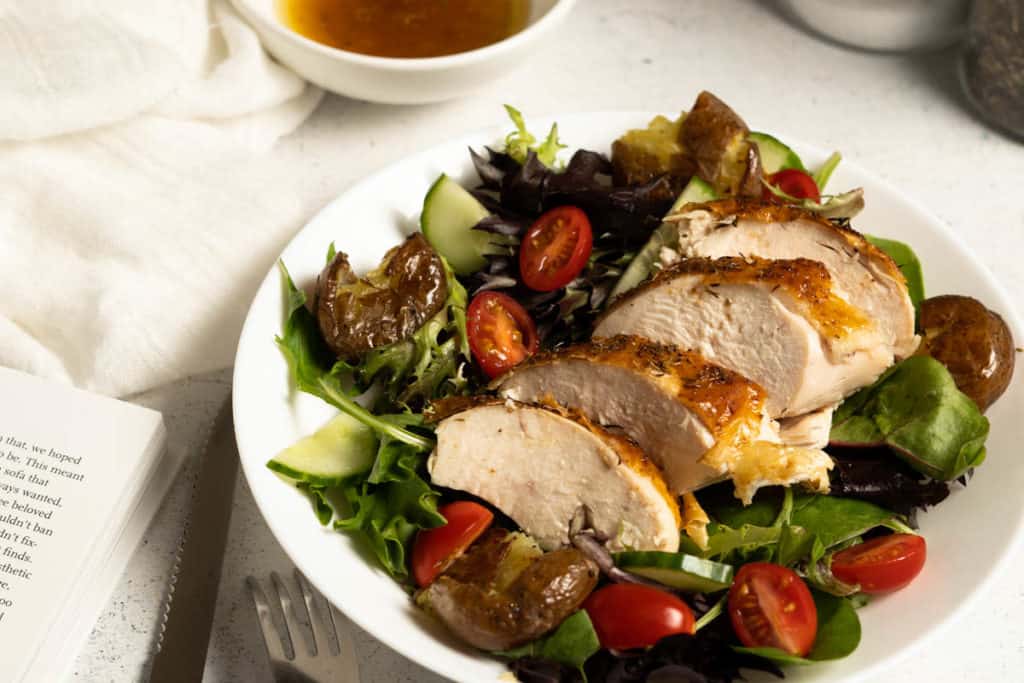
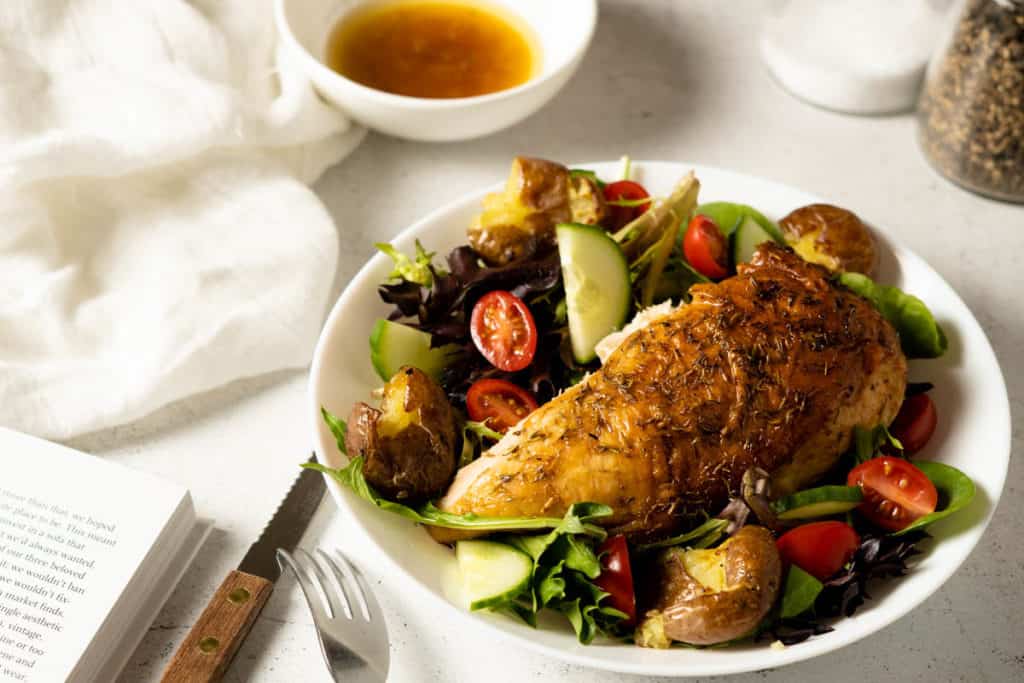
Serve this 4 ingredient roast chicken alongside roasted potatoes and carrots for an easy weeknight meal. Toss some baby potatoes and diced carrots in olive oil, salt and pepper and bake with your chicken. Or try alongside my delicious roasted vegetable salad https://busybutcooking.com/roasted-vegetable-salad/.
Storing Tips
Store unused portions in an airtight container for up to 2 days in your refrigerator. Shred up leftover roasted chicken on a salad or add it to your next chicken noodle soup. Keep the chicken carcass for making stock for cooking.
How to Freeze Roast Chicken
For a make-ahead meal, break up your roasted chicken into smaller portions (i.e. breast, thigh, drumstick) and store in freezer bags making sure you remove as much extra air as possible. Unfortunately, freezing will create water crystals that will toughen up the meat and dry it out. Dividing up the chicken into smaller portions freezes faster and minimizes ice crystal formation.
Did you try this recipe? Let me know in the comment below!
Other easy weeknight meals to try:
Ground pork and zucchini in brown sauce
Frequently Asked Questions (FAQ)
If you have a fresh, air-chilled chicken on a tray there is no need to rinse your chicken. The hot temperature of your oven will be more than enough to kill off any harmful bacteria. If you happen to purchase a Cryovac wrapped chicken sitting in its own juices, I would rinse it in a large bowl in your sink. Make sure you don’t have water splashing everywhere (and chicken juices) to save from a major wipe down later.
Not directly, make sure you defrost it first. I’ve tried this recipe with fresh and previously frozen chicken. The fresh chicken is always better but if the chicken was frozen properly, dry brining it will produce a pretty decent bird. As long as you defrost the chicken in the fridge the night before dry-brining it, it’s perfectly fine.
It’s best to use poultry within 2 days of purchasing it. I try to follow this rule but at the very least before the best before date.
The internal temperature for cooked chicken is 145°F/63°C for chicken breast and 160°F/72°C for chicken thigh. Breast meat internal temperature doesn’t need to be as high as the thigh meat but stick to 160°F if you’re concerned.
A rimmed baking tray is the best pan for roasting chicken because it allows for a larger area of exposure and crispy skin! A wire rack will also mean crispness underneath but placing it on the tray by itself also works fine since most of the meat is on the top, especially if the chicken is spatchcocked.
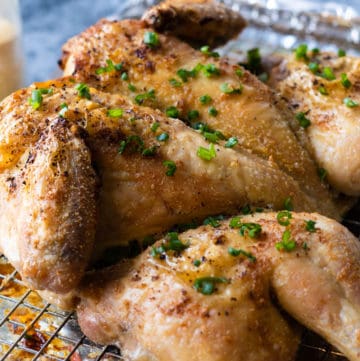
Easy 4 Ingredient Roast Chicken Without Butter
Equipment
- 1 rimmed baking tray
- 1 wire rack
- aluminum foil
- kitchen shears
Ingredients
- 3½-4 lb raw whole chicken (1.82 – 2 kg) (air chilled) (Note 1)
- kosher salt (Note 2)
- 1 Tbsp. garlic powder (Note 3)
- 1 Tbsp. olive oil (Note 4) (canola, vegetable or grapeseed oil)
Instructions
Dry Brine – Day Before (optional) (Note 5)
- Remove the chicken from its packaging, removing any giblets, neck and feet (if still attached).
- Spatchcock/butterfly the chicken as described in this post, removing the spine with kitchen shears and flatting the ribcage so the chicken lays flat. (Note 6)
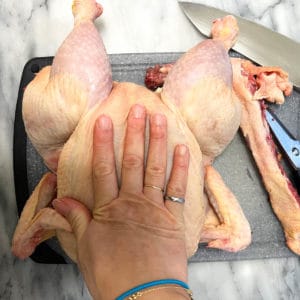
- Dry the skin as thoroughly as possible by blotting with a paper towel to remove as much moisture as possible. Remove any lingering blood clots, especially around the spine area.
- Separate the skin from the meat by placing one or two fingers from the neck and working your way down the breast to the bottom. Go from the bottom and work your way up. Work gently and carefully to not tear the skin. (Note 7)
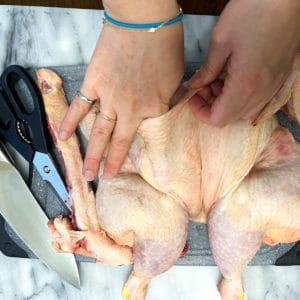
- Sprinkle the salt all over the top of the chicken and underneath the skin (where you separated the skin from the breast)
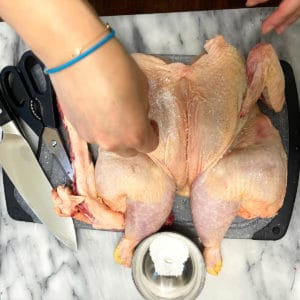
- Sprinkle garlic powder evenly all over the chicken.
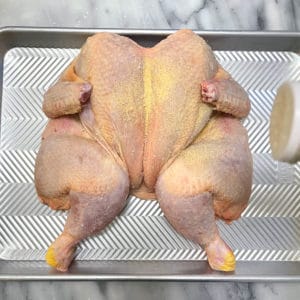
- Line a rimmed baking sheet with aluminum foil and place a wire rack on top. (Note 8)
- Lay the chicken flat on the rack with the breasts in the middle of the pan and the legs outside.
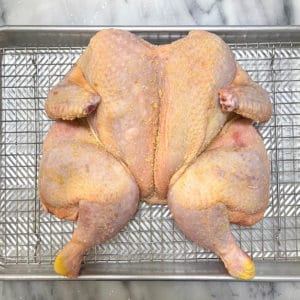
- Place the chicken in your fridge uncovered overnight to dry. (Note 9)
Roast the Chicken – Day Of
- If preparing the chicken on the same day, follow the dry brine instructions above (Steps 1- 8). (Note 10)
- Take out the raw chicken about 30 minutes before baking. Let it sit at room temp for more even cooking. (Note 11)
- Preheat oven to 425°F/218°C.
- Rub the chicken all over and under the skin with oil.
- Put the entire tray into the oven for 35-40 mins depending on its weight. (Note 12)
- Using a meat thermometer. Check the thickest part of the breast close to the bone and make sure it reads 145°F (63°C). In the thickest part of the thigh close to the bone, check to make sure it reads at least 160°F (72°C).
- Let it rest uncovered in the tray for 10-15 mins before carving (temperature will continue to rise).
Sandy
I’ve never tried the spatchcock method but trying this has opened up my eyes! Thank you!
Ellen
I never really embraced the spatchcock method before either but once I tried it, it was a game changer for me. Your chicken cooks up faster and is incredibly juicy. As long as you’re ok with the butterfly look it’s the only way I roast my chicken now!
Christine
Thank you so much for this recipe! I always thought spatchcocking would be too difficult and take too long, but it was easy and fast!
I’m not a big fan of roast chicken, but they were 2 for 1 at my market and I’m so glad I found this recipe. I followed it exactly except I didn’t use the oil and they cooked up juicy and full of flavour with beautifully crispy skin.
I did one with garlic powder, mustard powder, and pepper. The second I used a Tex-Mex blend and smoked paprika, both are delicious!
Ellen
Hi Christine, I’m so glad the chicken roasted up beautifully! It’s way easier than most would imagine. Your spice mixes sound delicious, I will definitely try those next time as well :). Thanks for the feedback and lovely comment!