
Lunch box cakes, also known as Korean bento cakes, are mini versions of full sized cakes. Perfect for a beginner baker, they’re simple in design and easy to decorate. My step by step instructions will create the most incredibly delicious and fluffy cake! Frosted with fresh whipped cream, this lunch box cake is super light and fit for up to two people (or…maybe just yourself)!
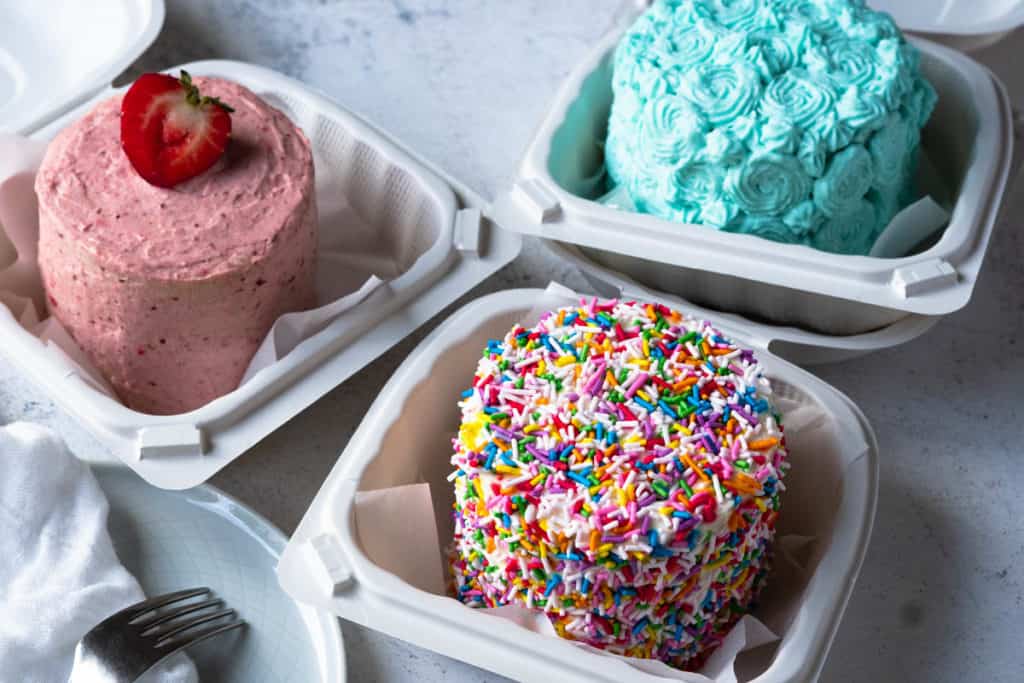
What are Lunch box Cakes?
Originating from South Korea, lunch box cakes are just smaller versions of regular sized cakes. They are usually between 3 – 4 inches (I prefer 3.5 inches) and 2 – 3 tiers. The key characteristic is that a lunch box cake fits into a clamshell container similar to a burger takeout box. This makes them really easy to transport as gifts.
They typically boast minimalistic designs and give out a cute homemade charm. Frost these mini cakes with whipped cream or buttercream and decorate with sprinkles, rosettes and/or candies – whatever you like! Add a sweet message and put a smile on someone’s face!
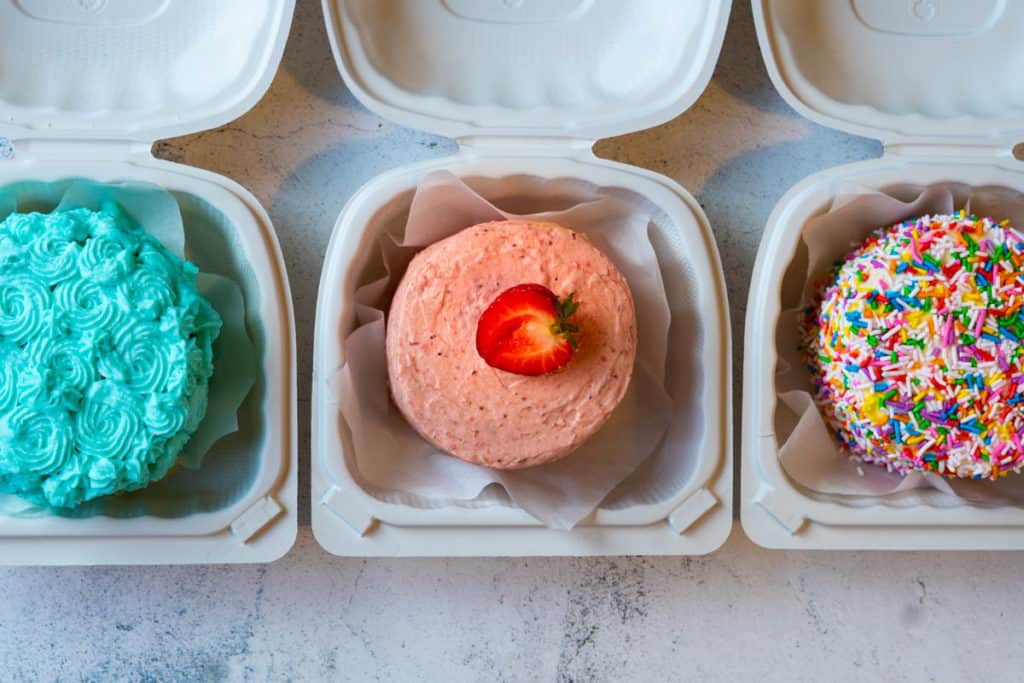
Why make a Lunch box Cake?
I first discovered lunch box cakes when I was looking for ideas for my daughter’s birthday. With the pandemic, a lunch box cake was perfect to share amongst just our family. It was also a nice treat to give out to family and friends who couldn’t celebrate with us in person. Since then, I’ve found so many other uses for lunch box cakes! But really, do we need to have any reason/excuse to eat cake?
Practice for new bakers
If you’re new to cake making and decorating, a lunch box cake is an economical and less wasteful way to practice! These cakes are smaller and easier to handle so you can improve those layering and decorating chops. It avoids the disaster of piping a rosette for the first time on your daughter’s actual birthday cake – the night before…(thank goodness pics can be taken to show only one side of a cake)
Small gatherings
Sometimes you don’t need a 6 inch cake. A 4 inch cake is the perfect size (for those post covid pounds). They are also great to be served alongside a dessert table for variety! (Side note: I personally embrace cake leftovers)
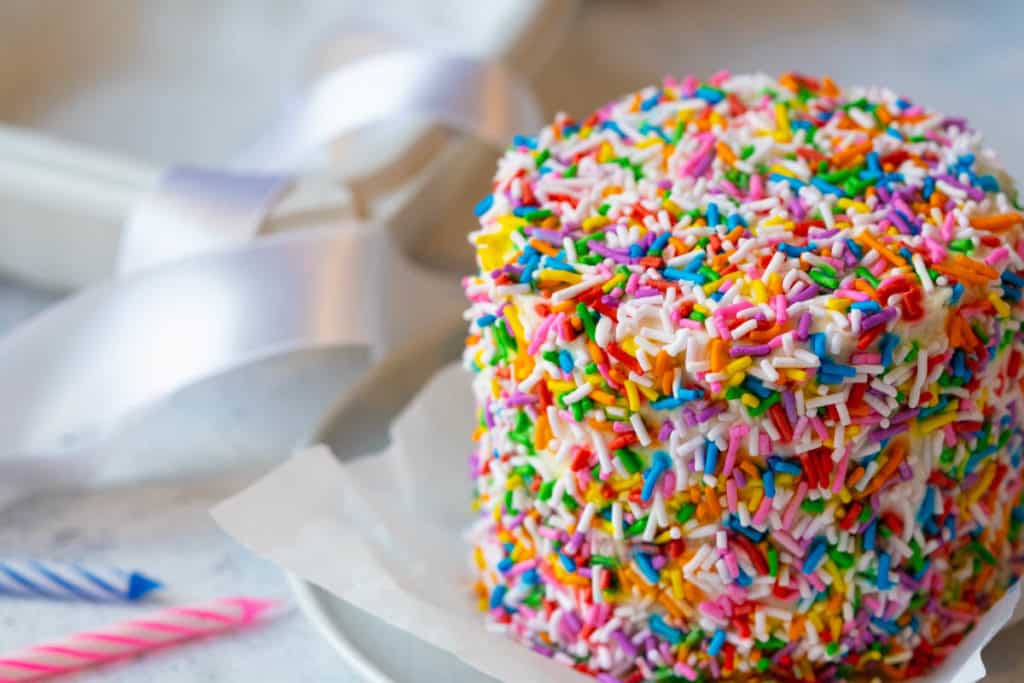
Gifting (especially during Covid)
With the transportability of a clamshell takeout box, these lunch box cakes are prime for giving away. Not to mention, way more economical than splurging on cake boxes. Brighten up someone’s day by dropping one of these off 🙂
Party favours
Cupcakes are all the rage for party favours, but why not give a mini lunch box cake instead? You can turn up the fanciness and uniqueness all at once. Plus, no one can resist a cute take home cake especially from a baby shower 🙂
Cake smash
If the idea of splurging on a custom ten person cake (only to get your 1 yr old bust their fist into it) makes your wallet cry, a lunch box cake might be the answer. You can also customize it just the way you like it and have a few as backups for your photoshoot.
Kids activity
Crafting and decorating anything is always met with squealy excitement in our house. Why not let your kids layer, pipe and decorate a mini cake fully loaded with their heart’s desire? Let them spark their creativity and develop those fine motor skills!
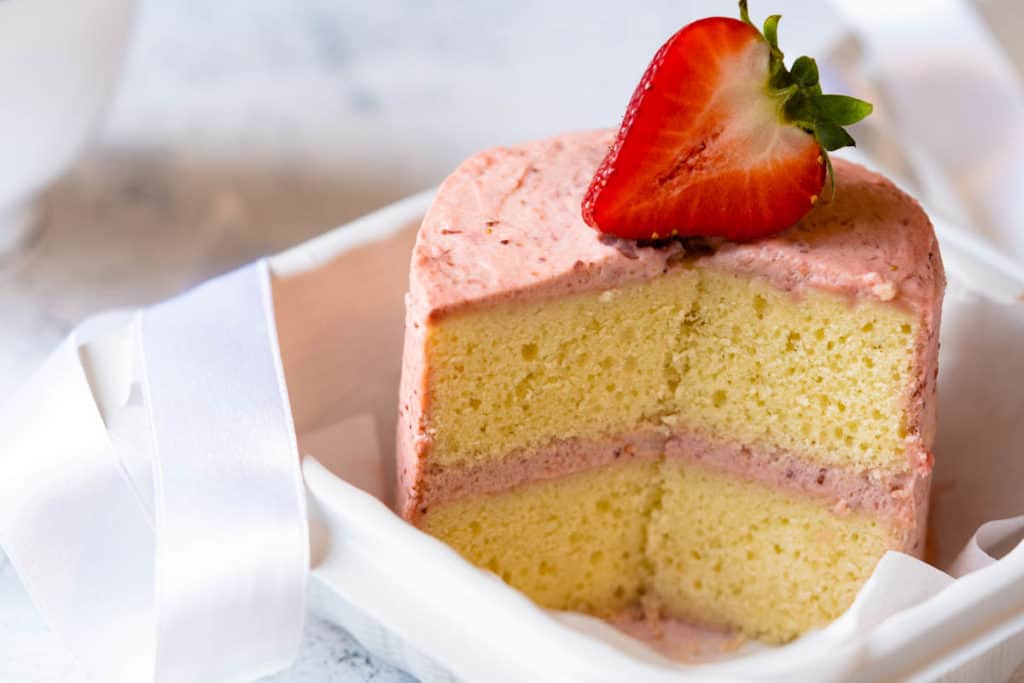
How to Make Lunch box Cakes
You can pretty much follow any regular cake recipe. Just make sure you use a 13”x 9” pan for lunch box cakes. I followed the RecipeTin Eats Vanilla Cake recipe because of the beautiful plush and almost cottony texture similar to Japanese sponge. It’s also super easy to make and stays moist for days. Aside from a good tasting cake, it helps if you’re planning on baking and decorating on separate days.
As an alternative, my banana cake recipe, also produces a super fluffy, moist and soft crumb!
Cake Baking Tips
I followed the instructions pretty closely along with some of my tips listed below:
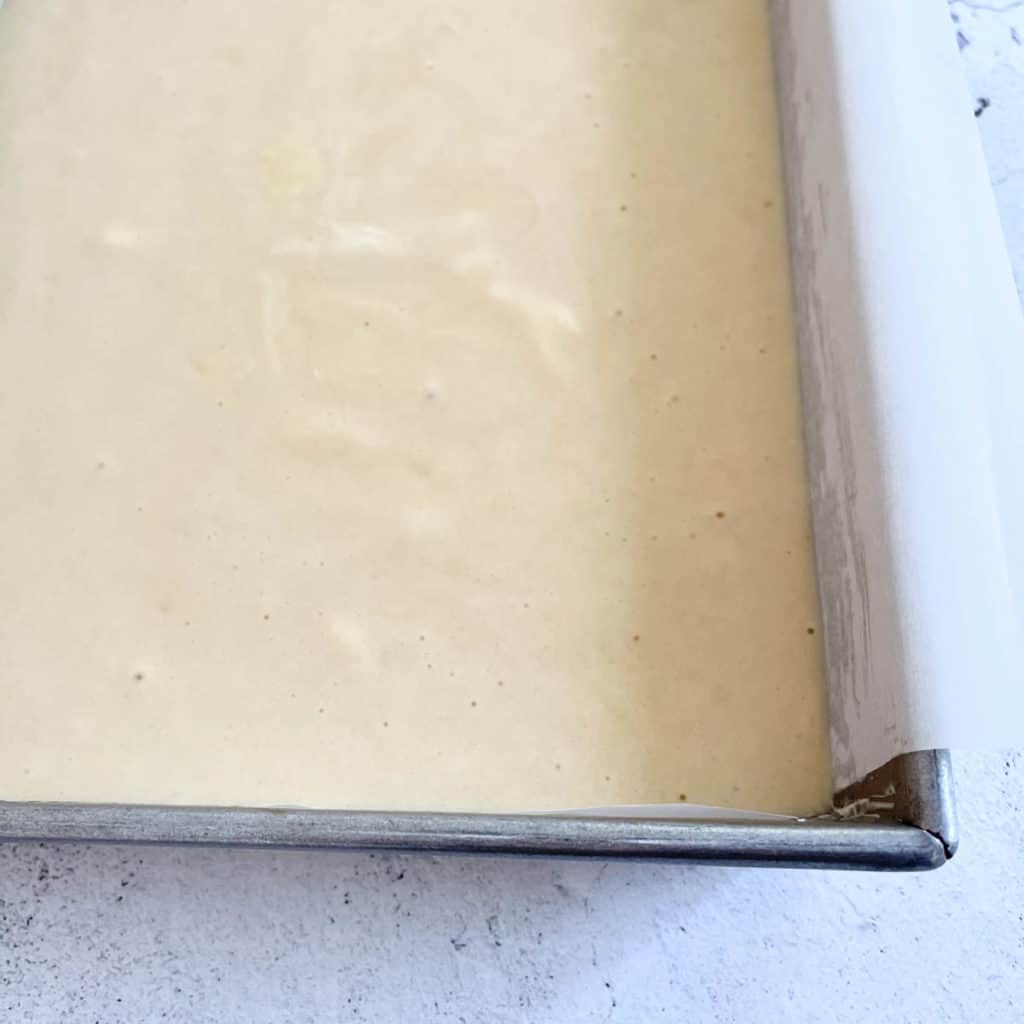
- Grease and line your 9”x13” baking pan and then cover with parchment paper at the bottom and all 4 sides. I crisscrossed two large parchment paper pieces to do this.
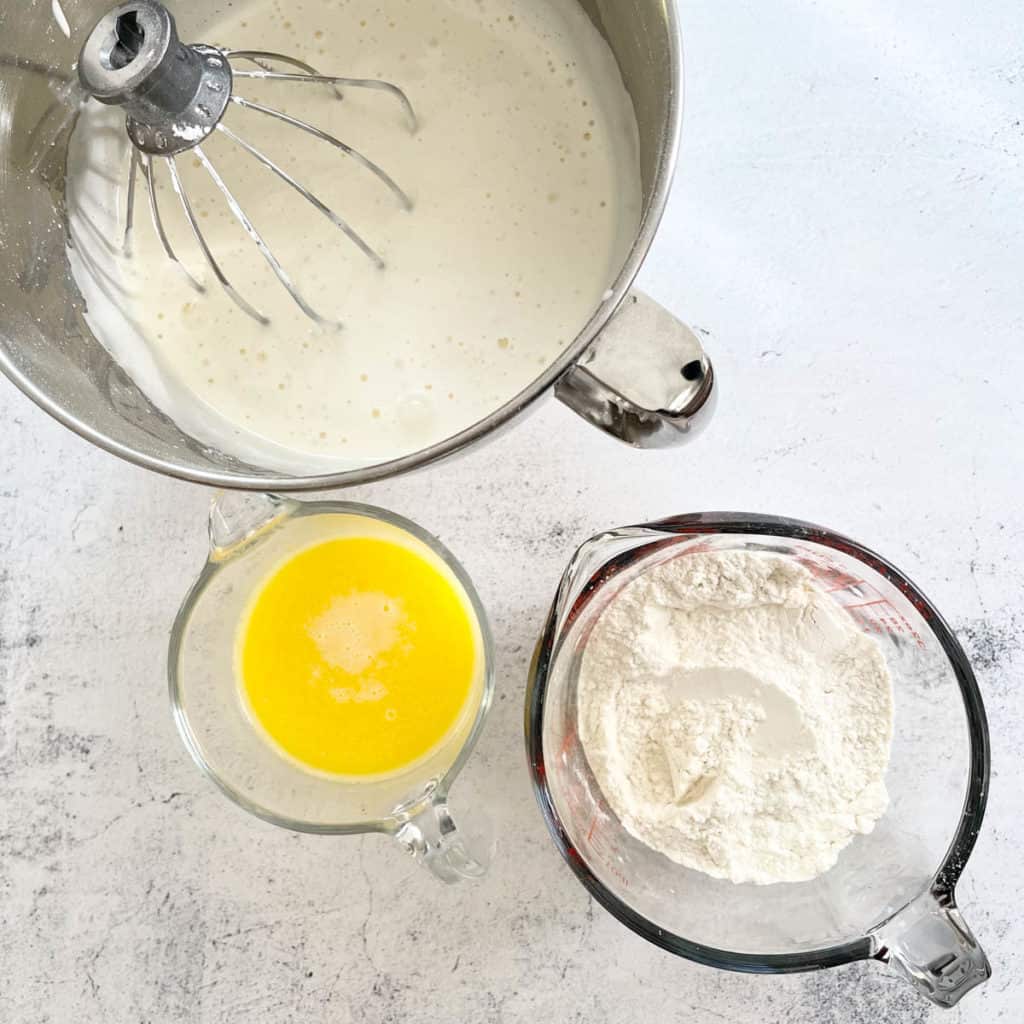
- A standing mixer makes things easier than a hand mixer for aerating the eggs. You will also have both hands free to combine your dry ingredients into your wet mixture.
- Use glass measuring pitchers for the flour mixture and the hot butter milk to make for easy pouring.
- Watch your cake after the 25 minute mark and start checking for doneness and to avoid overbaking.
- Read all the instructions before starting.
- Preheat your oven before you start, since this cake comes together fast!
Whipped Cream Frosting Instructions
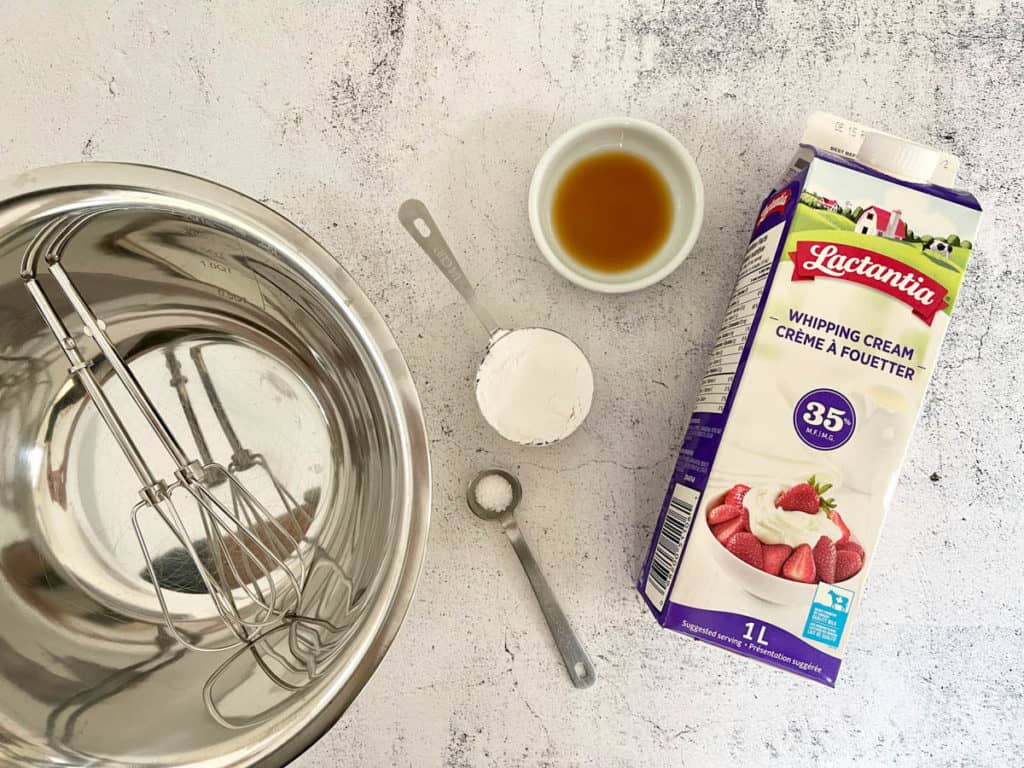
Step 1: Place a stainless steel bowl and whisk/beaters in the fridge for at least 15-20 minutes (a cold bowl ensures success). Alternatively, set your bowl on top of a bigger bowl with some ice.
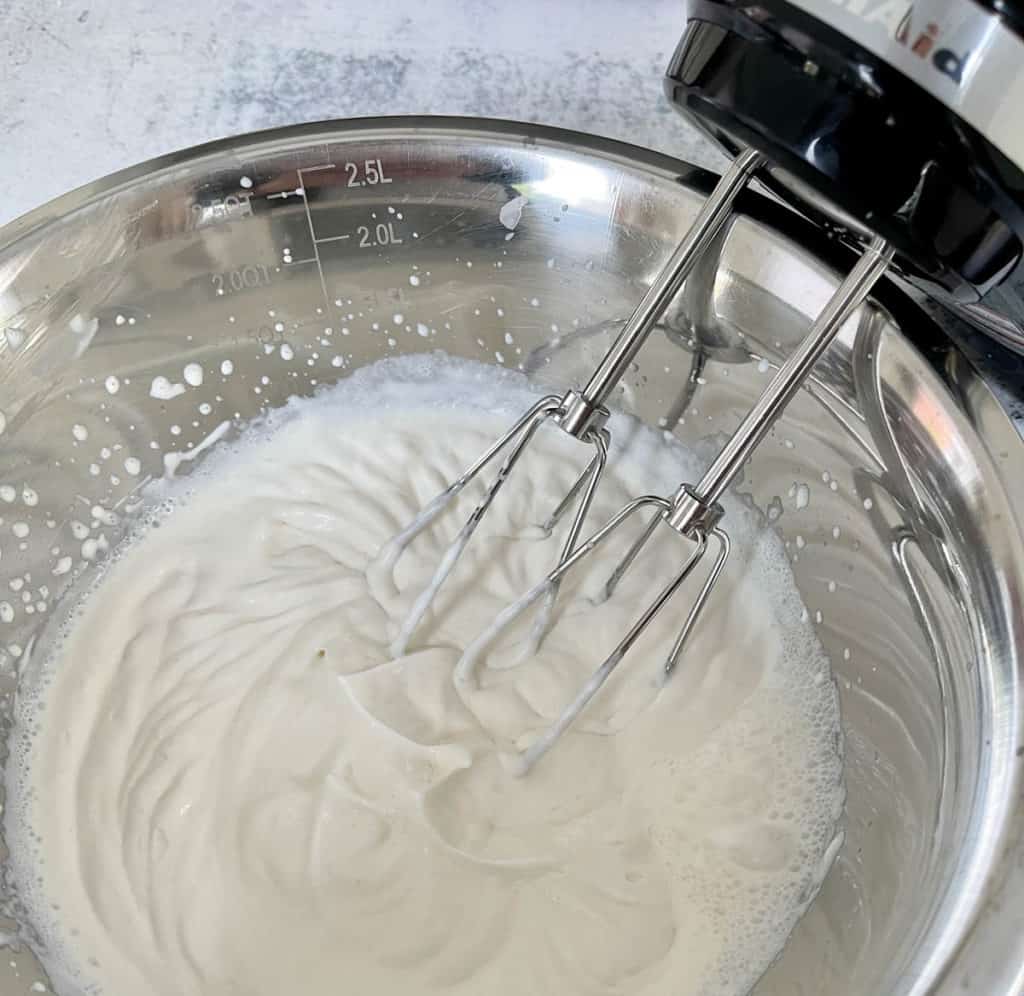
Step 2: Pour the whipped cream into the bowl and whisk on high for about 1 minute.
Step 3: Add the powdered sugar, vanilla extract and salt and continue whisking.
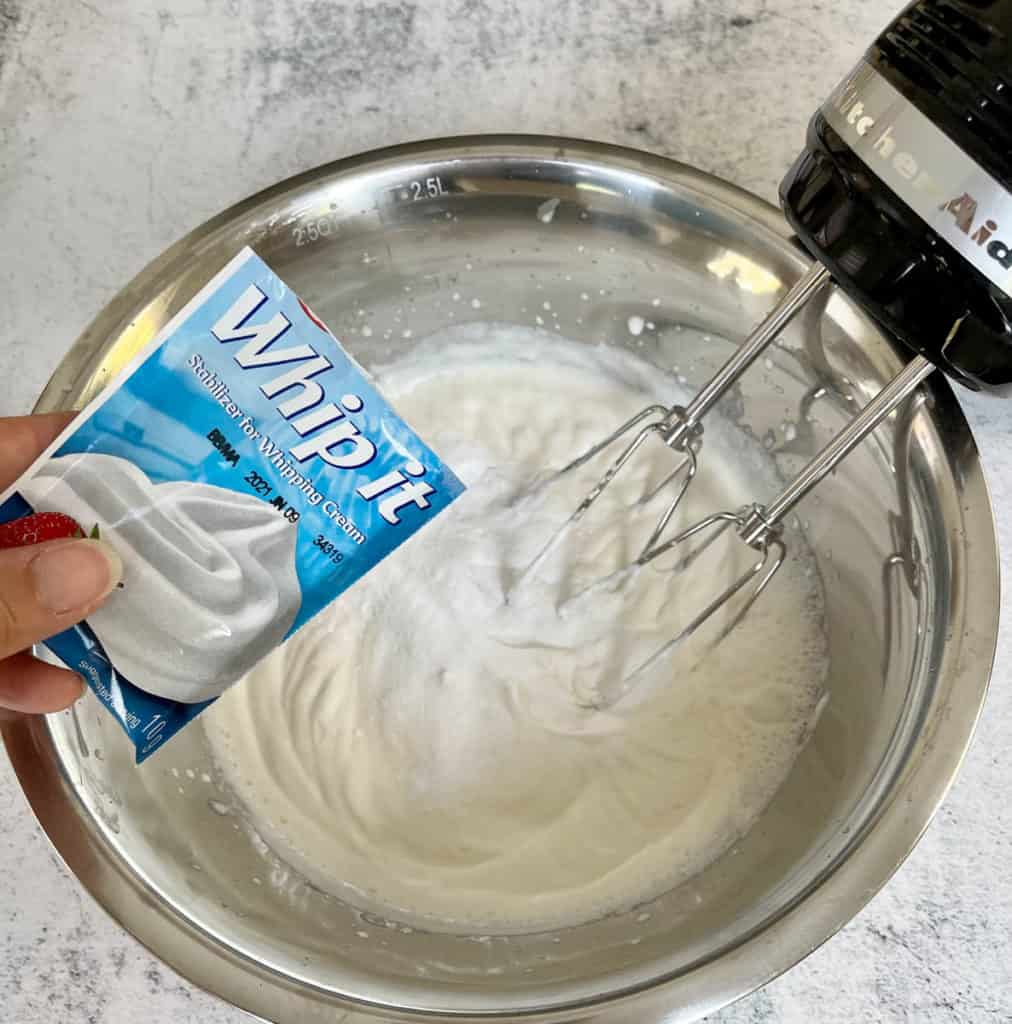
Step 4: When soft peaks start to form, add the whipped cream stabilizer (if using)
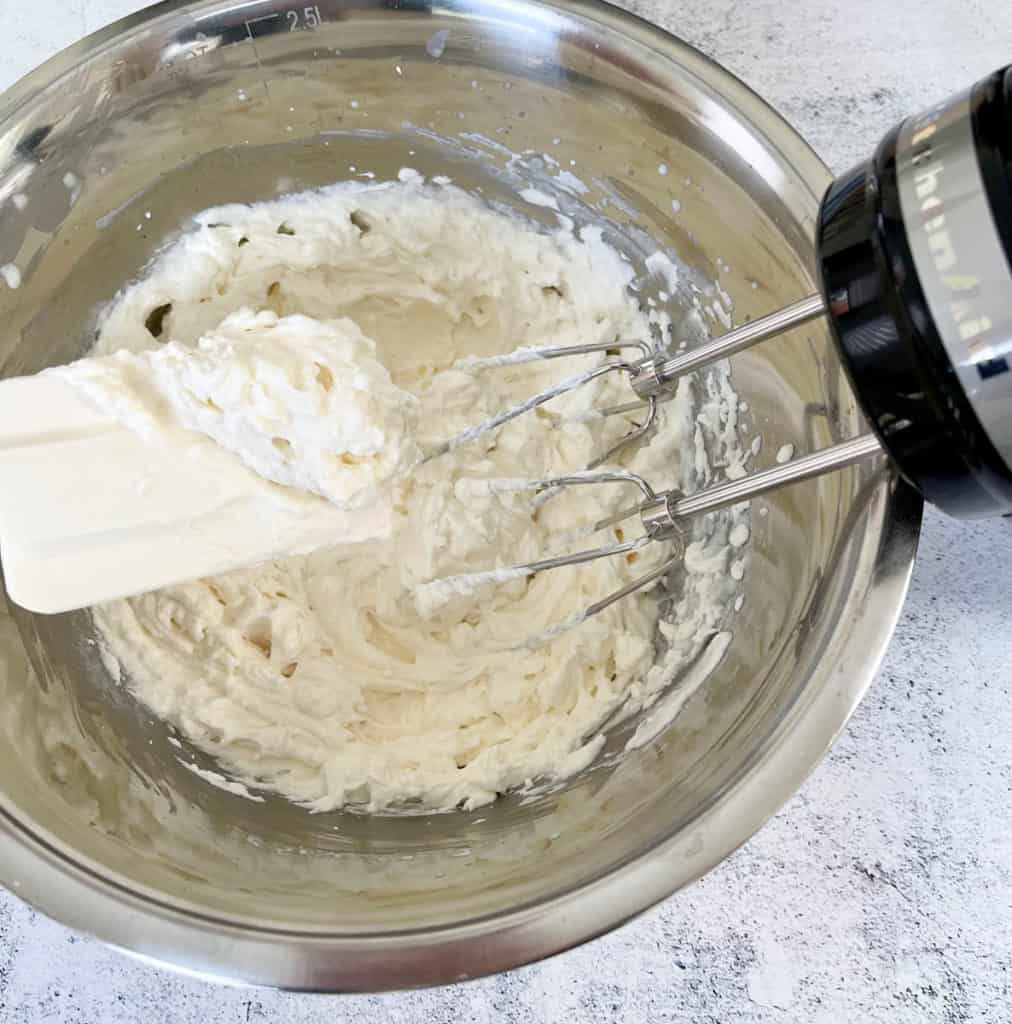
Step 5: Continue whisking on high until you start to see stiff peaks. Change to low speed and continue whisking. Watch carefully, as the whipped cream will come together fast. Overmixing will create butter.
Step 7: Once the whipped cream is formed, scrape down the sides of the bowl with a spatula and mix thoroughly
How to Assemble Lunch box Cakes
Step 1: Cut out 3 pieces of 5 inch x 5 inch parchment paper. These will serve as your base for decorating.
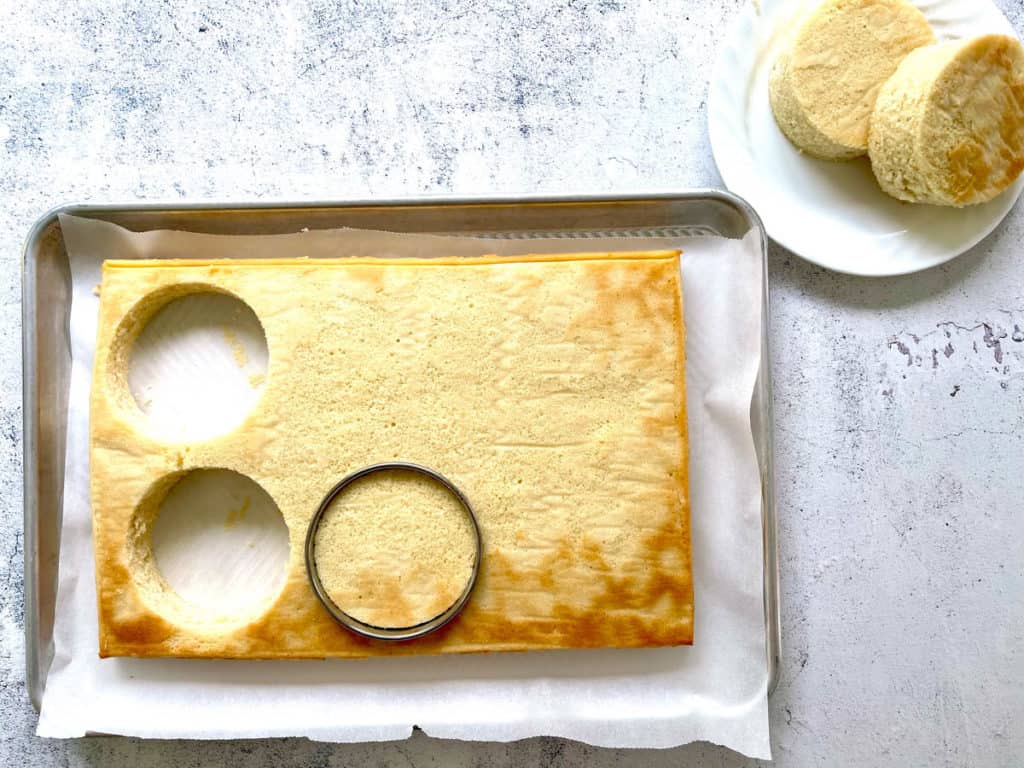
Step 2: Once the cake is cooled completely, use a 3.5 inch cookie cutter and cut out 6 rounds.
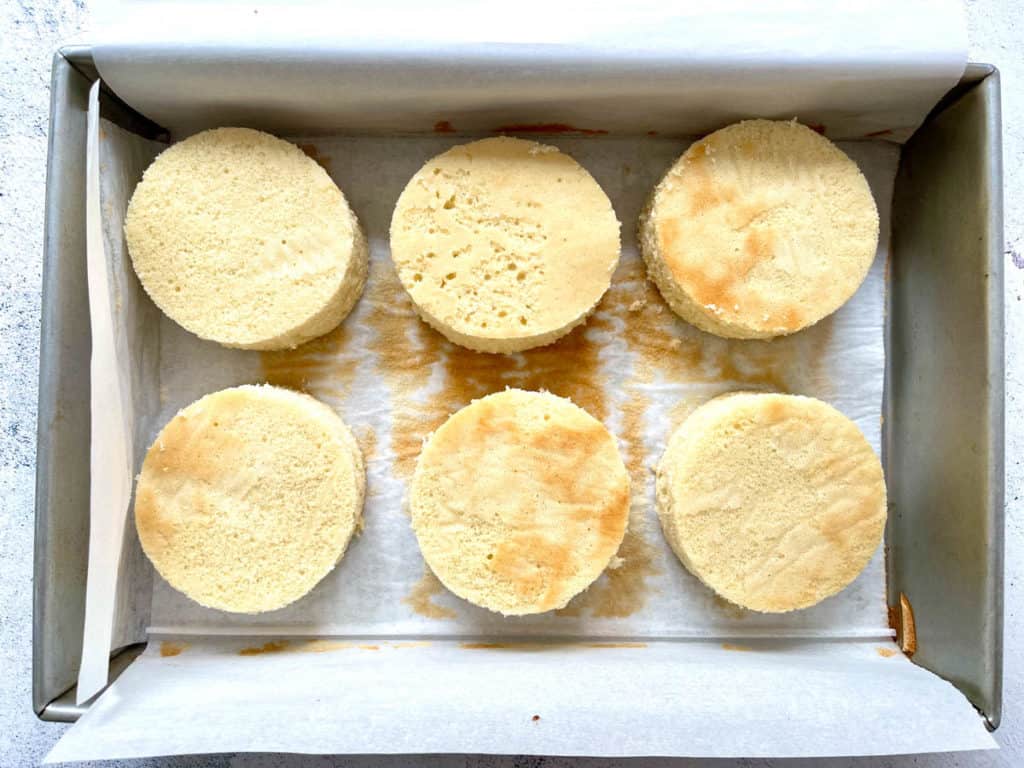
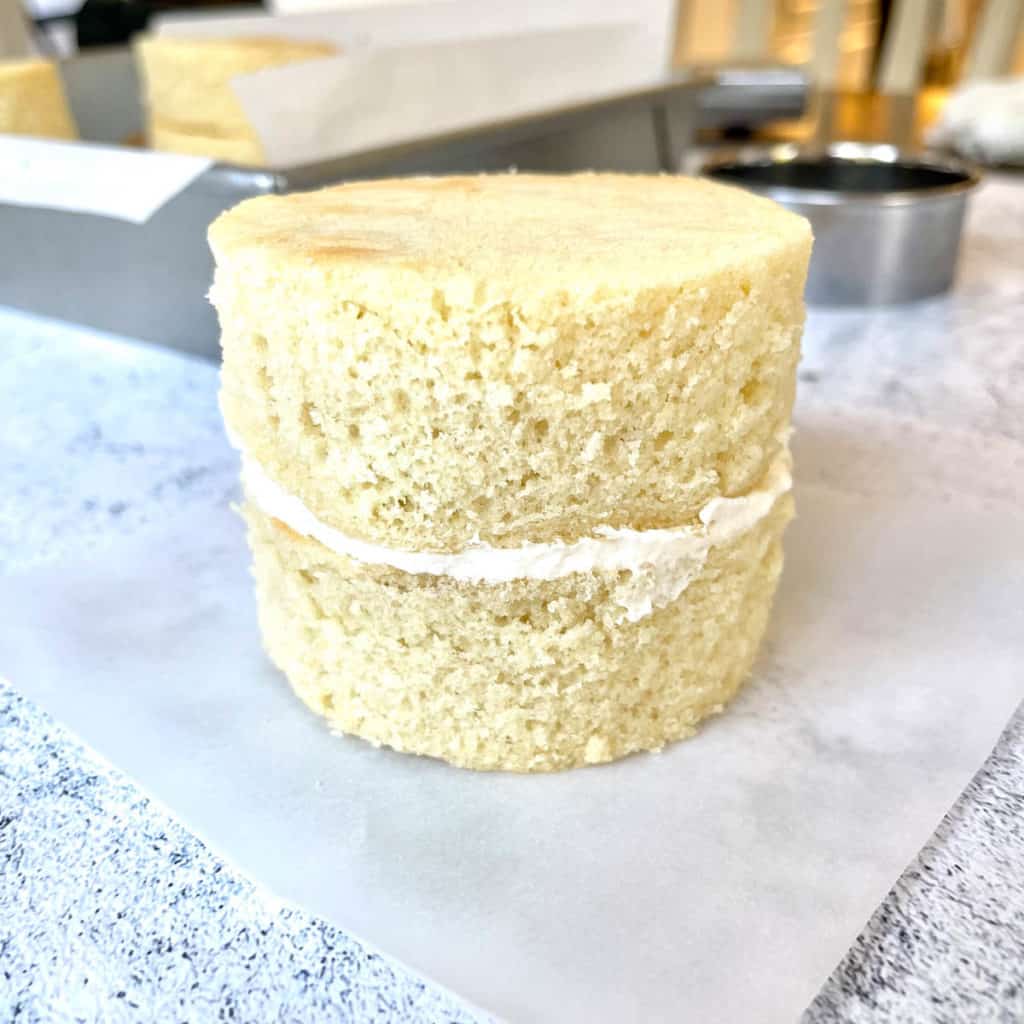
Step 3: Carefully remove the cut out cakes and choose 2 pieces for each cake. I usually play around with the 6 cut outs, stacking them in pairs to make sure I get 3 level cakes. If they are slightly slanted, you can level it out with frosting.
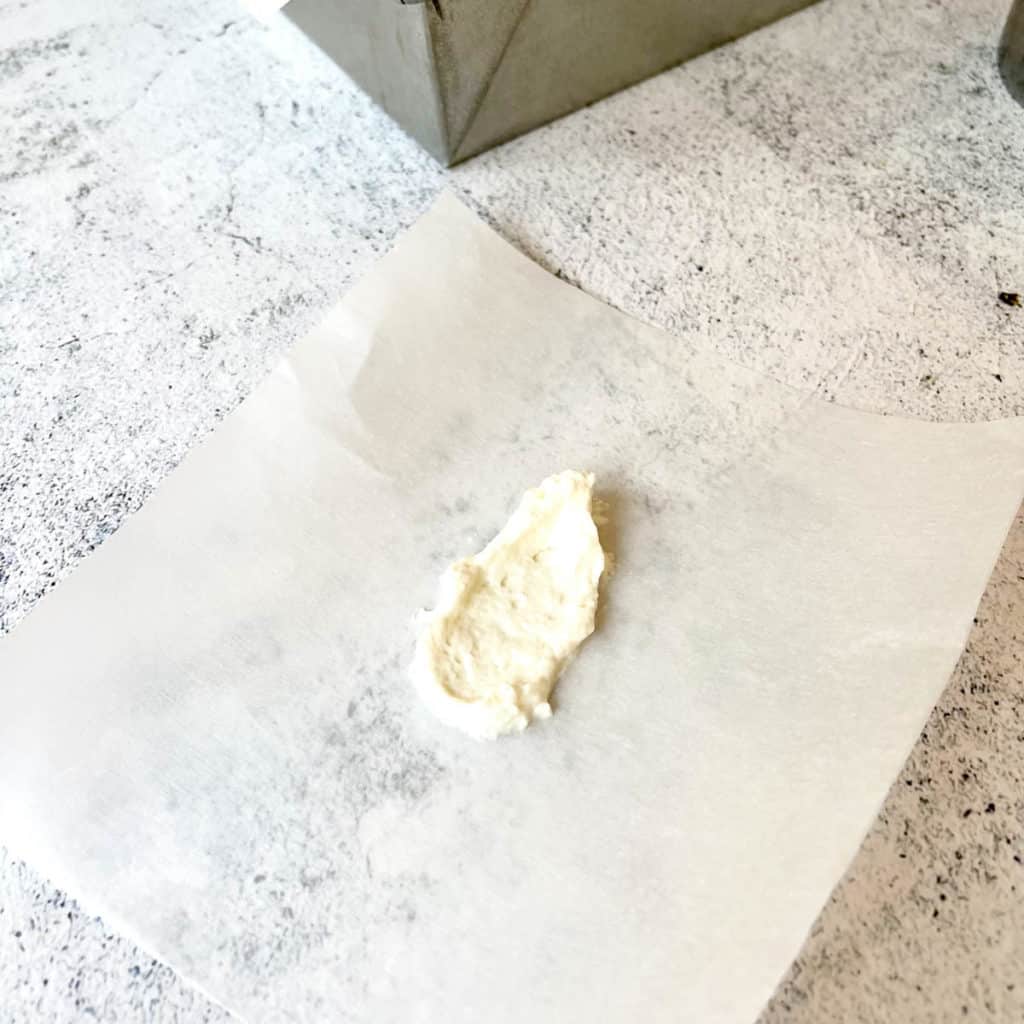
Step 4: On a piece of parchment paper, place a dab of whipped cream and place your cut out.
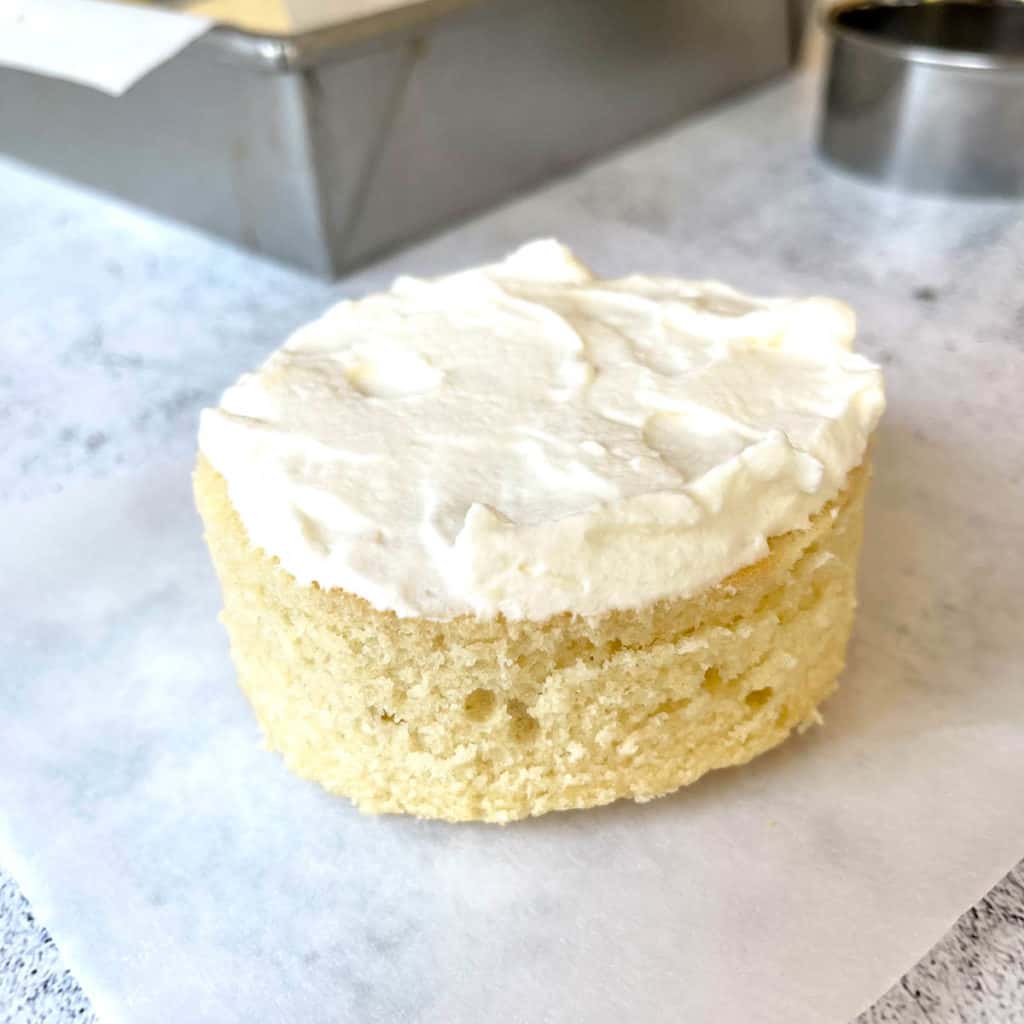
Step 5: Brush on some soaking syrup (if using) and spread some frosting on top.
Step 6: Place a second cut out on top and check to make sure it’s level.
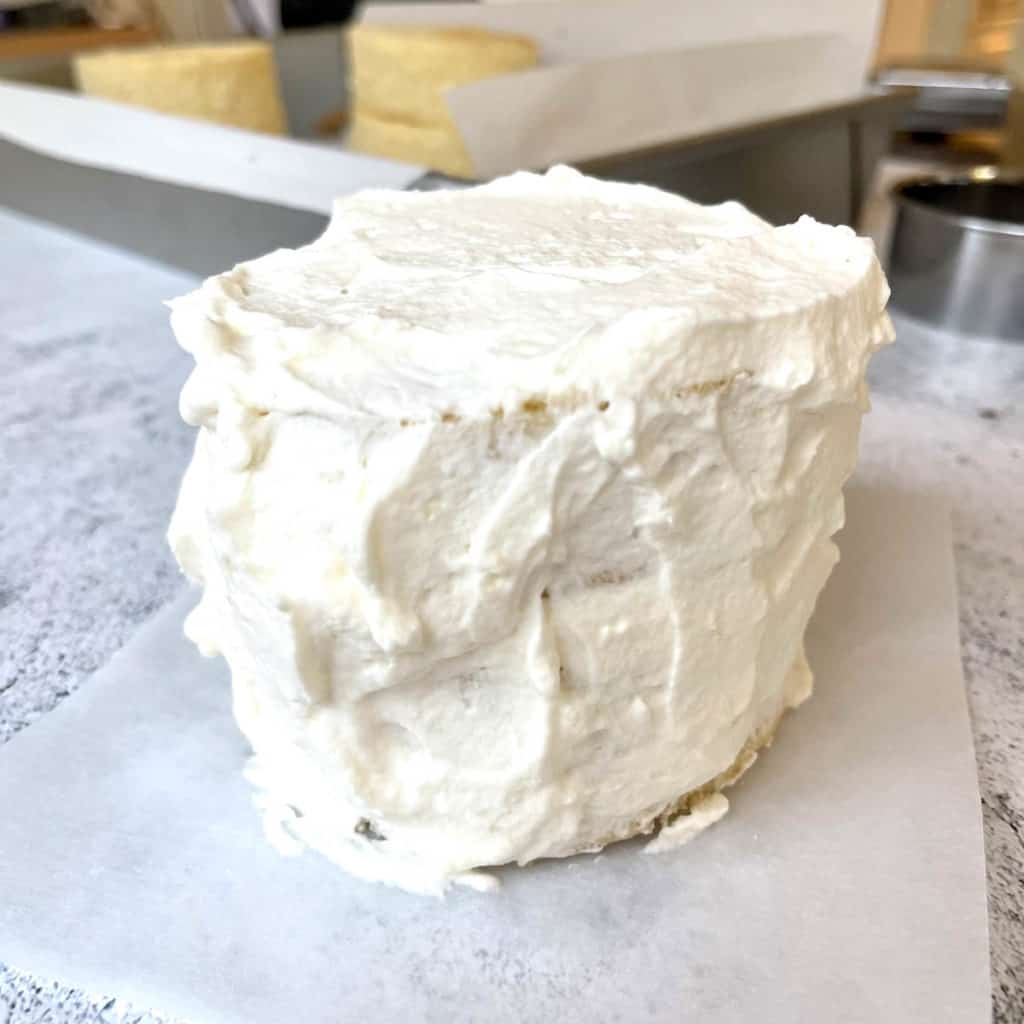
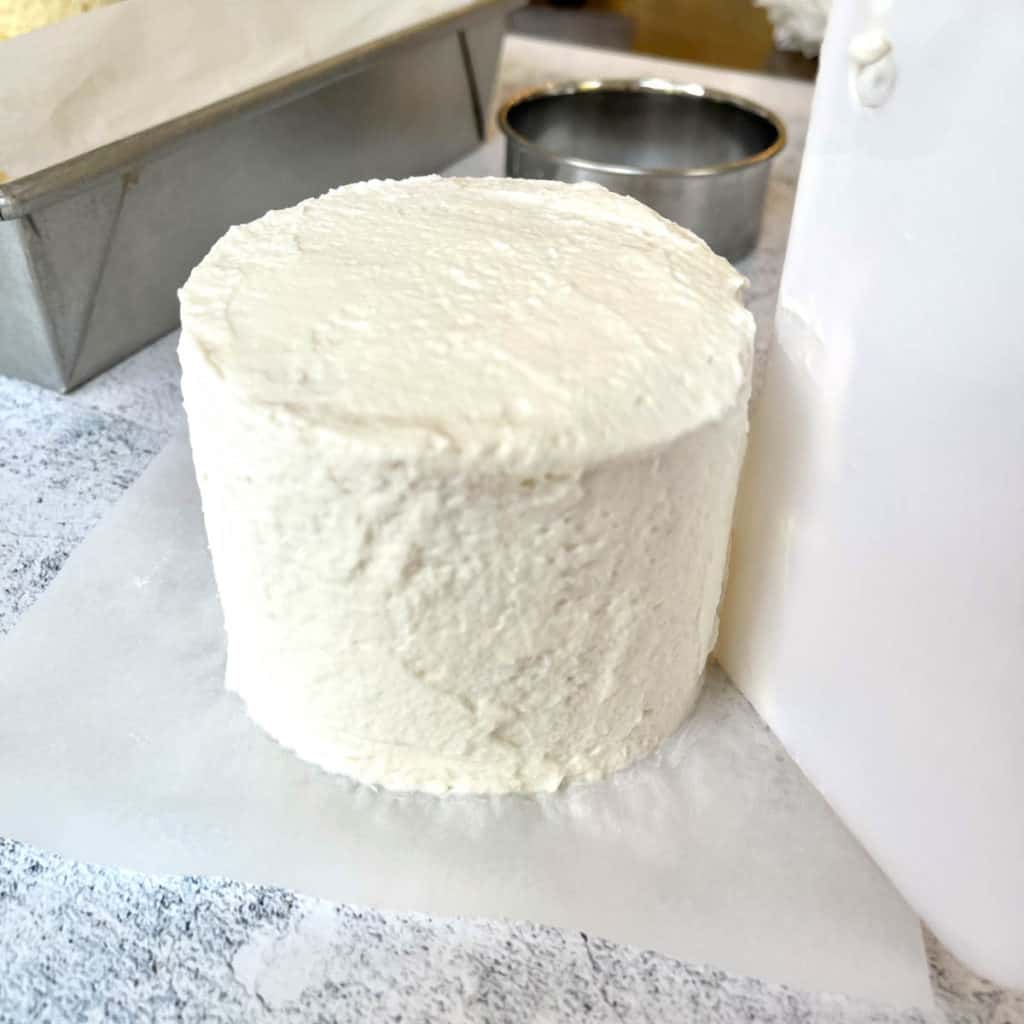
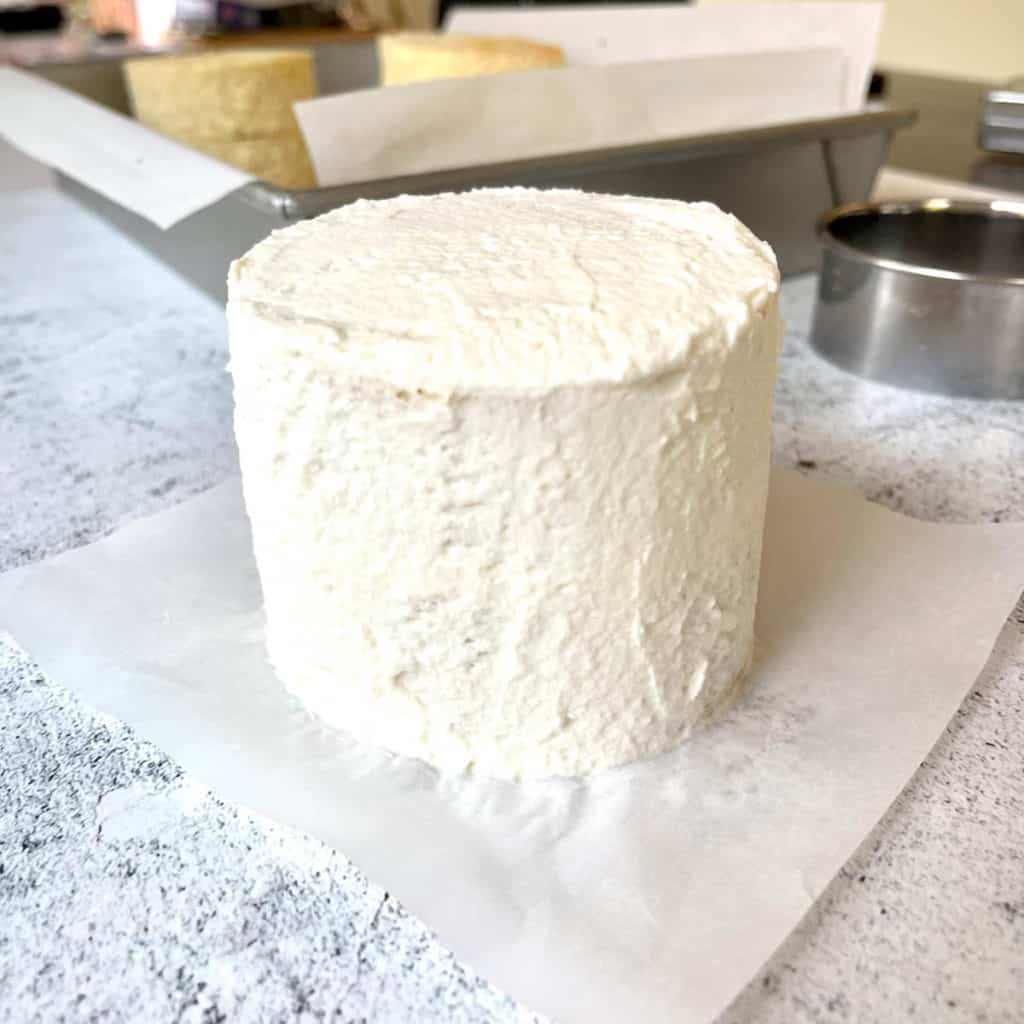
Step 7: Go frost happily! Frost the top and sides and smooth it out with a spatula or a bench scraper. Since the cake is so small, I just rotated the cake using the piece of parchment paper to get a smooth look.
Step 8: You can leave it clean or add sprinkles, candy or pipe a design!
Decorating Tips for Success
- Use cookie cutters to cut out the shapes. You will have leftover cake pieces (which I shamelessly ate for snack after) or can use to make cake pops
- Use a soaking syrup to ensure a moist sponge – especially if you’re making these ahead of time.
- Anchor your first tier and keep it from moving by putting some whipped cream or buttercream on the parchment paper under your cake tier.
- If your frosting gets runny, pop your cake and frosting in the fridge for about an hour to solidify again. Rewhip your frosting for a few minutes to get the consistency and resume decorating.
- Add a crumb coat (thin coat of frosting) if you want to make sure no crumbs end up on your frosted design. I found this specific cake recipe didn’t create too many large crumbs while frosting and I didn’t need it.
- If you want to make piping designs, like rosettes, I’d recommend buttercream since it crusts a bit after to reduce smearing.
- When decorating lunch box cakes, keep in mind the takeout container it goes in. Add fruit slices or “flat” designs on top of the cake and not ones that stick up too much. I wouldn’t add a design higher than ½ above the top of the cake.
- I would recommend using buttercream or whipped cream frosting for this cake. The small size of these cakes can’t hold up to fondant.
- Clean up any frosting smears on the parchment paper by wiping it with a damp paper towel. The bottom edge doesn’t have to look perfect since they will be “hidden” in the lunch box container.
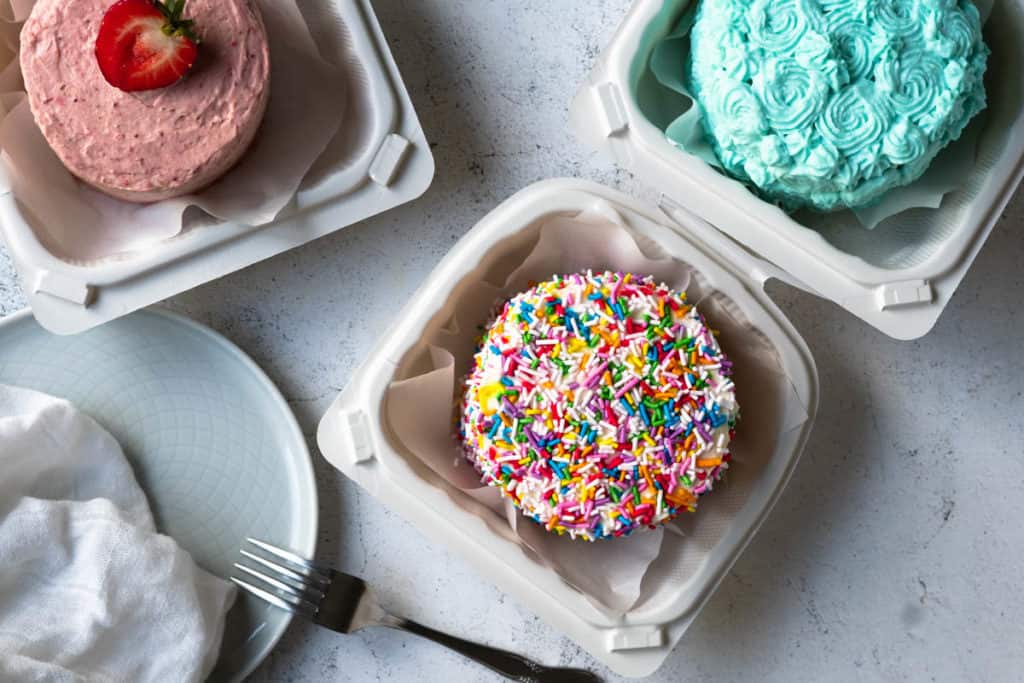
Decorating Ideas for Lunch box Cakes
Let your creative juices flow! If you need some inspiration, here are some ideas:
- Smooth frosting with a piped message.
- Covered entirely with sprinkles of your choice.
- Covered entirely with piped mini rosettes.
- Smooth frosting with a piped border on top of the cake. Use your favorite piping tip (star, round etc) and put evenly sized dollops all around the border. Add a message too!
- Frost entire cake as smoothly as possible and using a fork, drag it gently straight across making pin stripes. Wipe and repeat. Don’t drag the fork too deep into the cake!
- Use different colored frostings and create painted marble effects.
- Smooth frosting with slices of fruit on top.
- Smooth frosting on the sides with scalloped frosting on top.
- Smooth frosting on the sides with hatched design frosting on top.
If the end look doesn’t look great, you can easily smooth out the frosting and try again!
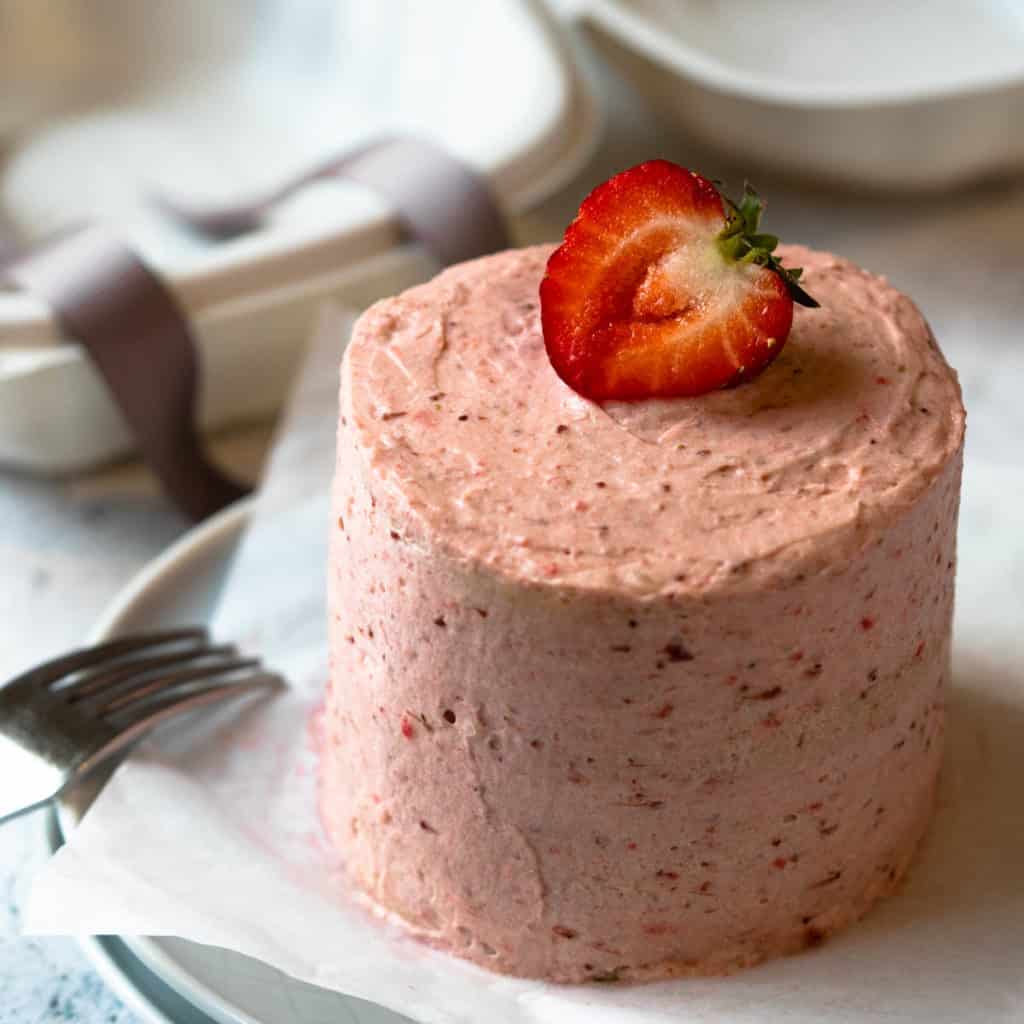
Packaging Tips
- Always cut out a piece of parchment paper 1 inch larger than your takeout box and decorate your cake on that. The paper is also crucial for transferring your cake into the takeout box.
- The bottom part of the cake doesn’t need to look perfect because the cake box hides any imperfections.
- Test out your design in your takeout box and make sure it doesn’t get squished when you close the lid.
- Add a ribbon and a cute message on the takeout box if it’s a gift!
Storing Tips
- Once frosted and finished, place your finished cakes in their lunch boxes and store it in the fridge. I would recommend storing it this way for up to 24 hrs.
- If you’re storing them longer – up to 48 hours, I would recommend putting them in an airtight container instead of the takeout box. Transfer to a takeout box right before.
Freezing Instructions
- Freeze cake layers just like regular cakes. Airtight in plastic wrap into a ziploc bag. Store flat.
- Buttercream can be frozen in an airtight freezer bag.
- Whipped cream shouldn’t be frozen and made the day of frosting.
- Thaw cake layers and butter cream overnight in the fridge and put at room temperature 1 hour before decorating.
Frequently Asked Questions
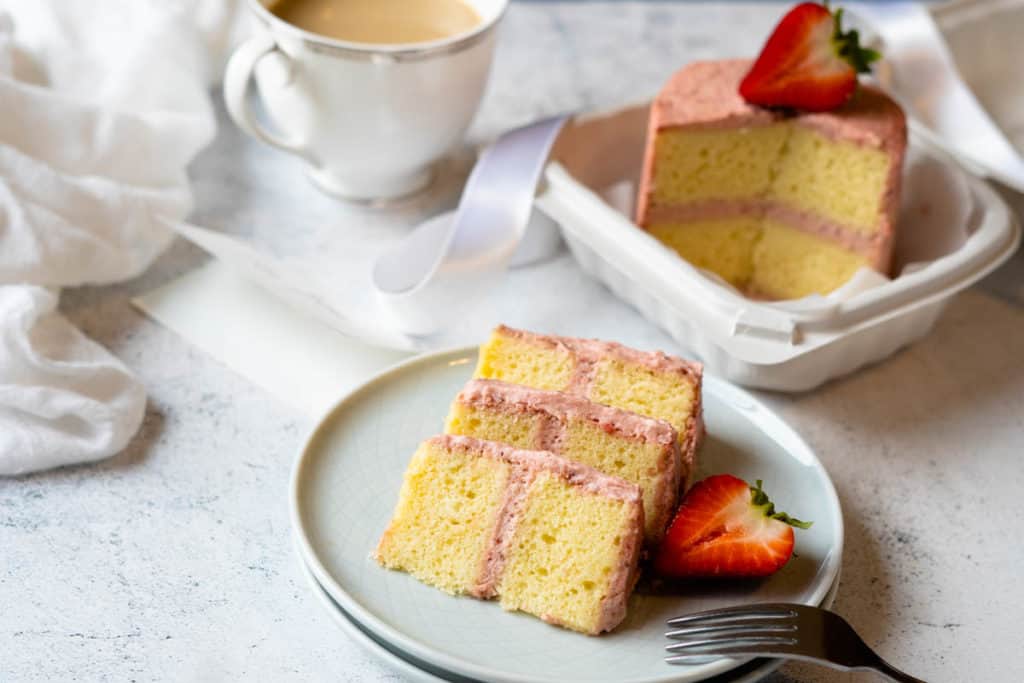
They usually range from 3.5 – 4 inches wide, have 2 – 3 tiers and typically serve 1 to 2 people.
The container size I’ve used in this recipe is 4 inches x 4 inches x 3.35 inches. This fits a 3.5 inch x 3.5 inch x 3 inch cake nicely. The cake recipe here makes a cake tier about 1 inch high which is perfect for 2 tiers plus frosting. Rule of thumb is to get a container about 0.5 inches larger in all dimensions than your cake. This will allow you to add a piece of parchment paper underneath for easy removal plus ample room at the top.
Decorate a lunch box cake just like you would a regular cake. Add rosettes, sprinkles or candies for a simple look or let your creative juices flow! The key is to choose a “flat” design to make sure it fits in the takeout box. Check out my decorating tips.
Mini Lunch box Cakes (Bento Cakes)
Equipment
- stand mixer fitted with whisk attachment
- 9 inch x 13 inch baking pan
- parchment paper
- 3.5 inch cookie cutter
- off set spatula
- side scraper
- glass measuring cups (1 large and 1 medium) or bowls
- stainless steel mixing bowl
Ingredients
Vanilla Cake (from Recipe Tin Eats) (see Note 1)
- 2 cups all purpose flour
- 2 ½ tsp baking powder
- 1/4 tsp salt
- 4 large eggs (at room temperature)
- 1 ½ cups powdered sugar
- ½ cup unsalted butter (1 stick)
- 1 cup whole milk
- 3 tsp vanilla extract
- 3 tsp grapeseed oil
Soaking Syrup (Optional) (see Note 2)
- 1 cup water
- 1 cup white sugar
- 1 tsp vanilla extract
Whipped Cream Frosting
- 2 cups heavy whipping cream (35% MF)
- ½ cup powdered sugar
- 2 packs whipped cream stabilizer (optional) (see Note 3)
- 2 tsp vanilla extract
- ¼ tsp salt
Instructions
Prepare Oven, Baking Pans and Equipment
- Preheat oven at 350°F (180°C). Place rack in the middle of the oven.
- Grease 9 inch x 13 inch baking pan with melted better. Crisscross two pieces of long parchment paper to line the bottom and up the four sides.
- For the whipped cream frosting, place a stainless steel bowl and whisk attachments in fridge. (a cold bowl ensures success) (See Note 4 & 5)
Vanilla Cake Baking Instructions
Make Flour Mixture (Mix Dry Ingredients)
- Add flour, baking powder and salt in a large glass measuring cup (for easy pouring) and whisk to combine.
Make Egg Mixture (Beat Eggs with Powdered Sugar Until Light and Fluffy)
- Beat eggs for 30 seconds on speed 6 with your stand mixer. Put your powdered sugar in an easy pour measuring cup.
- While the mixer is going, pour the powdered sugar into the beating eggs.
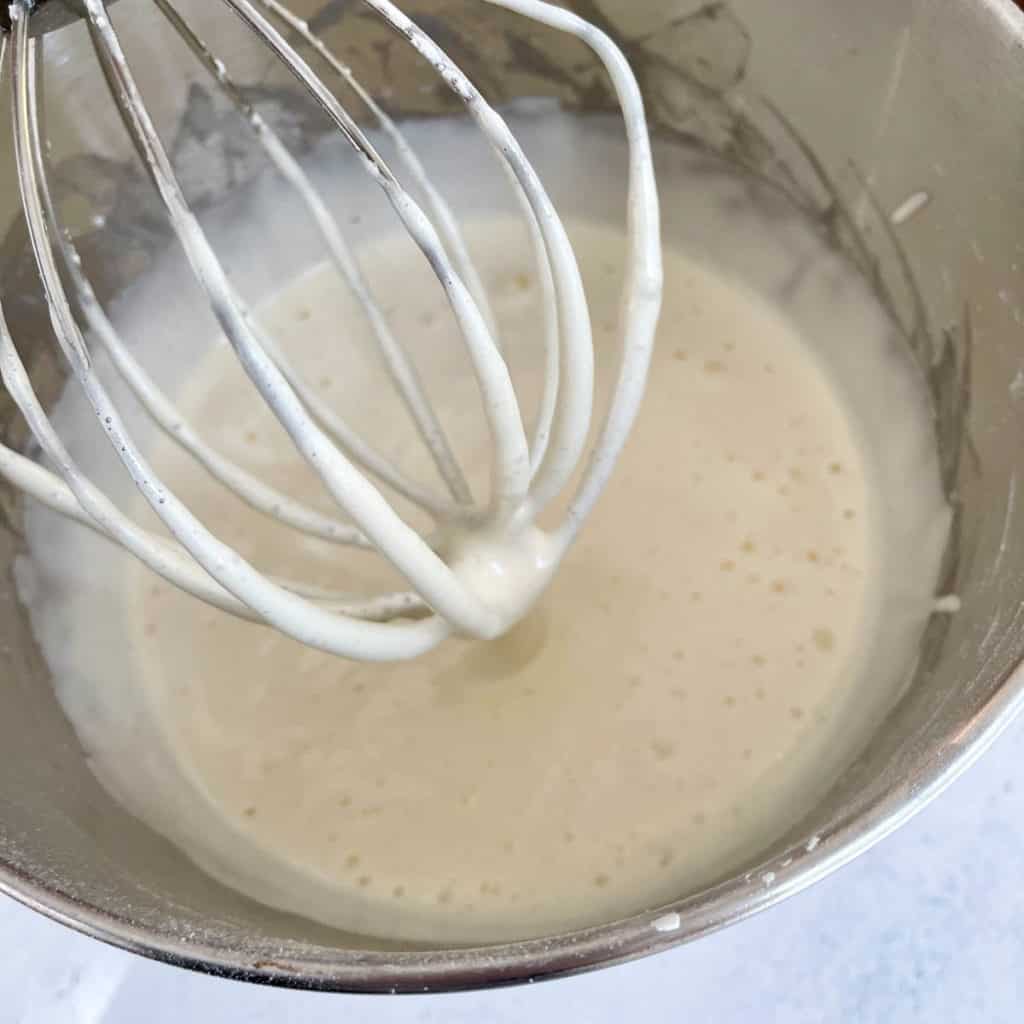
- Increase the speed of your stand mixer to 8 and beat for at least 8 minutes. Stop the mixer briefly to scrape powdered sugar off the side of the bowl to mix thoroughly (if needed).
- Egg mixture should be off white, glossy and triple in volume when done.
Make Hot Milk Butter Mixture
- While eggs are mixing, cut the stick of butter into 1 inch chunks. Place the butter and milk into a microwaveable cup and heat on high for 2 minutes (stirring halfway). Milk and butter should be foamy and hot.
Combine Cake Batter
- While the milk butter is heating, add the flour mixture in 3 rounds to the finished egg mixture. For rounds 1 and 2, mix for 5 seconds or less on speed 1 to lightly incorporate. For round 3, mix for 10 seconds or less until flour is JUST combined and you no longer see dry flour. It's ok if you see clumps. If you see any flour along the sides of the bowl, take a spatula and scrape it in and mix it in gently by hand.
- Combine hot milk butter mixture, vanilla and oil into the now empty flour mixture measuring cup. Put approximately 2 ladles of the flour/egg mixture into the hot milk butter mixture. (see Note 6)
- Temper this mixture by whisking it to thoroughly combine (don't worry about overmixing here, you're tempering the hot milk).
- Add this tempered mixture to the rest of the flour/mixture to make the finished batter. On speed 1, mix for 10 seconds or less until JUST combined. Don't overmix!
Bake the Vanilla Cake
- Pour finished batter into prepared 9 inch x 13 inch baking pan.
- Knock out big air bubbles by banging the baking pan 3 times on the counter.
- Bake for 25-30 minutes. An inserted toothpick should be clean with a few crumbs attached.
Transfer and Cool Cake
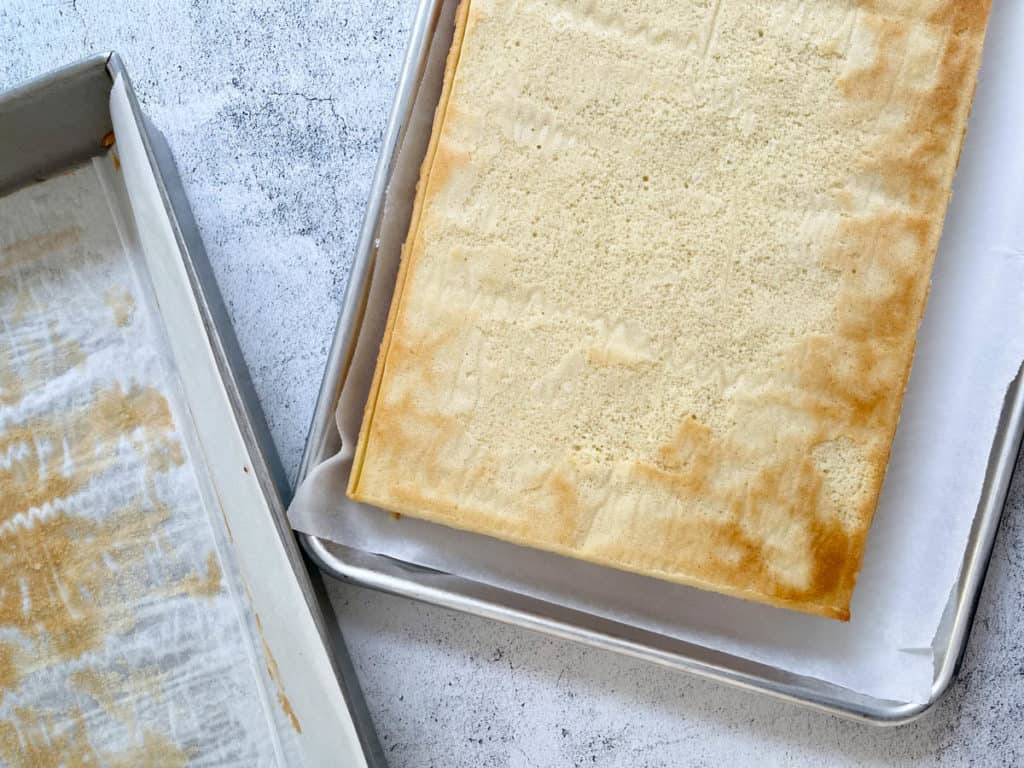
- Cool in baking pan for 15 minutes, then cover the cake pan with a cutting board. In one swift motion, flip the cake pan upside down. You should hear the cake release.
- Remove the cake pan and peel off the parchment paper. Cool completely.
Prepare Decorating Elements
Prepare Soaking Syrup
- While cake is baking, add water and sugar in a small saucepan. Heat on medium/low heat.
- Once sugar is completely dissolved. Remove from heat. Don't boil.
- Cool completely. Mix in vanilla.
- Store cooled soaking syrup in a bottle in the fridge.
Make Whipped Cream Frosting
- Remove your cold stainless steel bowl and whisk attachments.
- Pour the whipped cream into the bowl and whisk with a hand mixer on high for about 1 minute.
- Add the powdered sugar, vanilla extract and salt and continue whisking.
- When soft peaks start to form, add the whipped cream stabilizer (if using)
- Continue whisking on high until you start to see stiff peaks. Change to low speed and continue whisking. Watch carefully, as the whipped cream will come together fast. Overmixing will create butter.
- Once the whipped cream is formed, scrape down the sides of the bowl with a spatula and give one last mix. Cover and place in the fridge until needed.
Cake Decorating Instructions
Construct Your Lunch box Cakes
- Cut out 3 pieces of 5 inch x 5 inch parchment paper. These will serve as your base for decorating.
- Once the cake is cooled completely, use a 3.5 inch cookie cutter, make 6 round cutouts in the cake (see Note 7)
- Carefully remove the cut out cakes. Swap and pick out which 2 cut outs stacked together make the most leveled cake.
- Pour out 1/4 cup of soaking syrup (if using) into a dish with a brush. Take out whipped cream frosting from fridge. (See Note 8)
- On a 5 inch x 5 inch parchment paper, place a quarter sized dab of whipped cream frosting in the middle. Place your first cake cutout on top to prevent your cake from moving while decorating.
- Brush on soaking syrup over your cake (if using).
- Using an offset spatula, spread the frosting on top. I recommend at least half an inch thick. Place the second cake cutout on top and brush on more soaking syrup (if using). Make sure the cake is level. Add more frosting in between the layers if needed.
- Spread frosting evenly on top and on the sides of the cake. Use a bench scraper or your spatula to even out edges. Since the cake is so small, rotate the cake using the piece of parchment paper when smoothing out the frosting.
- Add sprinkles, candies or pipe decorations. Get creative!
Place Cakes in Lunch boxes
- Take your clamshell boxes and place it close to your cakes.
- Taking the edges of the parchment paper underneath your cakes, lift the cakes gently and place them into the clamshell boxes. You can also use a spatula to transfer the cakes over (I was able to do this without it)
Jon
I tried these over the weekend and got my kids involved with the decorating. They had a blast! Thanks for sharing your recipe!
Ellen
Hi Jon! So glad to hear your kids enjoyed decorating these cakes. They can keep little hands busier for longer than cupcakes!
Sasha
Can you use a 4” cake pan? If so how long should I put the cake in for?
Ellen
Hi Sasha! Yes, you can definitely use a 4″ cake pan which means you also won’t have any wasted cake. I didn’t try this myself but I would half the recipe to make four layers (i.e. 2 cakes) instead. I’d expect it would take 18-21 minutes but I’d suggest checking for doneness at the 17 minute mark to make sure you don’t overcook. Let me know how it turns out! Thanks for visiting 🙂
Mala Tang
Nice cake Ellen, I will try, thanks 🙂
Ellen
Thanks for visiting Mala! Hope it turned out great 🙂
Angel
Could I half this recipe to make 1 cake? Do you have the measurements for 1 of these cakes.